
 |
|
Published: October 11, 2009
Updated: December 13, 2009
Validated with Amaya
by Richard G. Baldwin
Flex Programming Notes # 102
This lesson is one in a series of tutorial lessons dedicated to programming with Adobe Flex.
What is Adobe Flex?
According to one of the pages on the Adobe website,
"Flex is a highly productive, free open source framework for building and maintaining expressive web applications that deploy consistently on all major browsers, desktops, and operating systems. While Flex applications can be built using only the free open source framework, developers can use Adobe® Flex® Builder™ software to dramatically accelerate development."
Download links for both the free Flex 3.4 framework and the (currently free for students) Flex Builder 3 product are provided in Resources.
What is Flash Builder 4?
A beta version of a future Adobe product named Flash Builder 4 is also currently availablefor free downloading (see Resources). According to the Adobe website, this will be an upgraded version of Flex Builder 3 with a new name. I have no experience with this product as of this writing.
One of several ways to create applications for Flash Player (version 9 or later)
Viewed from another perspective, Flex 3 (combined with ActionScript 3) provides one of several ways that developers can produce downloadable applications that will run in Adobe's Flash Player (version 9 or later) or Adobe Air (see Resources).
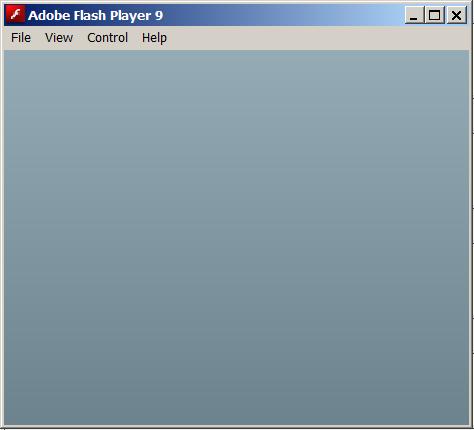
Very briefly, Adobe Flash Player usually runs applications in a web browser while Adobe Air runs applications in a stand alone mode from the desktop. Note, however, that it is possible to cause Flash Player to start and run in a stand alone mode by double clicking on an swf file. (See Figure 1.) If double clicking doesn't work, you can locate and run the file named FlashPlayer.exe. Once it is running, you can open and run other swf files.
Why do I care about Flex and Flash Player?
One of the fastest growing segments of game programming is the area of social games that typically run in Flash Player. I currently teach a course titled "Game Development using C++" and have a long-term interest in possibly teaching a course in "Game Development using Flex."
Flex and ActionScript
However, my more immediate interest is related to two other courses that I teach. One of those courses is an introduction to XML. The other course is Object-Oriented Programming using ActionScript 3.
Flex is an XML-based language that produces mxml files. The mxml files, along with other resources, are compiled into swf files that can be executed in Flash Player (version 9 or later) or Adobe Air. Most of the lab projects in my XML course require the students to create Flex projects.
Most of the lab projects in my more advanced ActionScript course require the students to use Flex as a launch pad for their ActionScript programs.
Flex SDK versus Flex Builder
Although it is possible to create Flex applications using nothing more than the free open source Flex SDK (see Resources) and a text editor, that can be very tedious. Flex Builder 3, which is currently free for educational use, helps you to write mxml files containing layout and controls and makes the process a lot more enjoyable. It will probably also help you to be more productive.
A complete Flex application
A complete Flex application consists of
As mentioned earlier, these are compiled into a Flash swf file, which can be executed in either a Flash player or (in some cases) Adobe Air.
Division of responsibility
Flex provides the layout and control structure for the application in an XML format while ActionScript provides the program logic.
ActionScript is an issue for my XML students
While earlier versions of ActionScript may have been simple and easy to learn, ActionScript 3 is a fully object-oriented programming language with a complexity level on a par with C++.
Students in my XML class aren't required to have any programming knowledge, and aren't expected to have prerequisite knowledge that would qualify them to learn ActionScript 3 while learning XML at the same time. Therefore, the first several lessons in this series will concentrate on the use of mxml for layout and control and will forego any requirement to understand ActionScript 3.
I recommend that you open another copy of this document in a separate browser window and use the following links to easily find and view the figures and listings while you are reading about them.
I recommend that you also study the other lessons in my extensive collection of online programming tutorials. You will find a consolidated index at www.DickBaldwin.com.
Download Flex 3
I have provided download links in Resources for both the free open source Flex 3.4 SDK and Flex Builder 3. (As I mentioned earlier, Flex Builder 3 is currently free for educational use. It remains to be seen if Adobe will make Flash Builder 4 free for educational use when it is released.)
Flex Builder 3 includes the SDK along with an IDE that is useful for creating Flex applications. Both downloads include a debug version of the Adobe Flash Player (version 9 or later).
Install Flex 3
Installation of the free open source Flex 3.4 SDK (without Flex Builder 3) is a little complicated. I have provided a link in Resources for Installation and Release Notes.
Installation of Flex Builder 3 is completely straightforward, at least that is true for Windows. The download is an exe file. Just execute the downloaded file and follow the installation instructions.
Getting started with the free SDK
If you are using the free stand-alone SDK, I can't help you much insofar as getting started developing Flex applications is concerned. As I understand it, that version includes a command-line compiler. You will need to create your mxml files using a text editor and compile them using the command-line compiler.
Getting started with Flex Builder 3
If you are using Flex Builder 3, I have provided several links in Resources that will help you get started using the IDE. Perhaps the quickest way to get started is to view some of the videos at the link titled Flex in a Week video training.
Create a new project
Once you have Flex Builder 3 running, pull down the File menu and select New/Flex Project. Enter the name of your new project into the dialog box, make certain that the radio button for Web application is selected, and click the Finish button. If you wish, you can specify a disk location for your project other than the default location.
The project tree
A directory tree for your new project will be created having at least the following folders:
Flash Player output for a new Flex project
The bin-debug folder will contain several files including one with an swf extension and one with an html extension. As I mentioned earlier, if you double-click the file with the swf extension, it should open in Adobe Flash Player (version 9 or later) looking something like Figure 1.
Figure 1. Flash Player output for a new Flex
project.
Browser output for a new Flex project
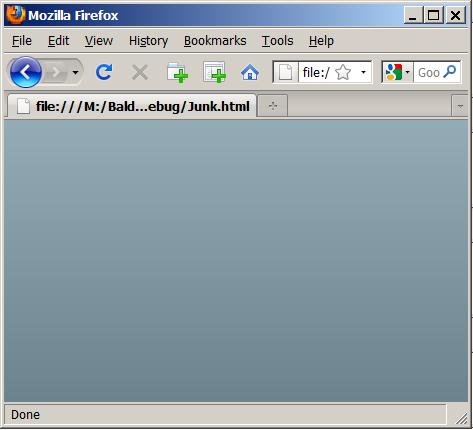
When you installed Flex Builder 3, you should have been given an opportunity to update one or more browsers to include a special version of the Flash Player (version 9 or later) plug-in that supports debugging. If you open the html file mentioned above in one of those browsers, the output should look something like Figure 2.
Figure 2. Browser output for a new Flex
project.
Boring!
Granted, these outputs aren't all that exciting. However, they should help to confirm that you have Flex Builder 3 and Flash Player (version 9 or later) properly installed and linked to your browser.
The src folder
The folder in the directory tree mentioned earlier that will probably command most of your attention is the folder named src. When you create a new Flex project, this folder will contain a file with an extension of mxml. If you double click on that file name in the upper-left IDE window, the mxml file will open in the text editor window of the IDE and will look something like Listing 1.
A skeleton mxml file
Listing 1 shows the skeleton mxml code for a new Flex project. This is the XML code that you will modify and supplement as you add features to your project.
Listing 1. Skeleton mxml code for new
Flexproject.
<?xml version="1.0" encoding="utf-8"?>
<mx:Application
  xmlns:mx="http://www.adobe.com/2006/mxml"
  layout="absolute">

</mx:Application>
|
Compile and run the project
You can compile and run the new project by selecting either Run or Debug on the Run menu. The new project should open in your browser looking pretty much like Figure 2. If you selected Debug, some debug text information should be displayed in the Console tab at the bottom of the IDE.
In this lesson, I will explain how to create a very simple Flex project named AppBackground01. To create this Flex project, you will add attributes to the Application element shown in Listing 1, producing the XML code shown in Listing 2.
In general, to create a more complex Flex application, you will also add child elements, which may or may not include attributes, to the Application element.
Layout versus behavior
As I mentioned earlier, you will develop your Flex application using the XML-based Flex language to establish the layout for your application.
Although it is possible to use Flex alone to provide simple behavior for your applications (simple event handling for example), you will probably need to use ActionScript 3 to produce more complex behavior for your application.
The layout consists of containers (that may contain other containers) with names like Canvas, HBox, VBox, etc. The containers will also contain controls with names like Button, CheckBox, ComboBox, etc.
The text editor
The upper-middle pane in the IDE has two tabs labeled Source and Design. If you select the Source tab, this upper-middle pane becomes a text editor in which you can edit XML and ActionScript code. In addition, the lower-left pane becomes an outline showing the hierarchical structure of your XML code.
If you select the Design tab, the upper-middle pane becomes a visual design editor and the lower-left pane becomes a toolbox containing a variety of components including Controls, Layouts, Navigators, and Charts. In this mode, you can drag components from the lower-left pane into the design pane and make physical adjustments to their location, length, width, etc.
In addition, in this mode, the lower-right pane becomes a property window. You can select a component in the design pane and then set various properties such as font, color, etc., in the properties window.
XML code is automatically updated
When you drag a component into the design pane and set properties on that component, the XML code is automatically updated to reflect the addition of that component with the specified properties. Therefore, when using Flex Builder 3 in design mode, you can largely avoid having to write raw XML code.
Flex Builder 3 versus the free open-source SDK
This visual design capability is probably the most important feature of Flex Builder 3 that separates it from the free open-source Flex 3.4 SDK. Flex Builder 3 lets you design your layout visually and it writes much of the XML code for you.
Documentation
One of the most important links in Resources is titled Adobe Flex 3.4 Language Reference. This is where you go to learn how to use the Flex language in detail.
Documentation format
In its default form, the documentation is divided into three frames, two stacked vertically on the left and one on the right. If you select All Packages and Frames at the top of the rightmost frame, you will see most of the allowable Flex XML elements (classes) listed in the lower-left frame. (For some reason, the Style element is not listed.)
Select No Frames
If you select No Frames at the top, the two frames on the left will disappear. This is useful if you want to use the Find capability of your browser to search for a word in the right frame. You can restore the three-frame format by selecting Frames at the top of the page.
Select a class
If you select a class, such as Application, in the lower-left frame, information about that class appears in the rightmost frame.
Styles
Every component has a variety of styles that can be applied to the component either through the specification of attributes in the XML element or the use of a Style element that resembles a style sheet. The example that I will explain in the next section will illustrate the relationship among the following styles for the Application element:
Run the program
Before continuing, I suggest that you run the program to familiarize yourself with the screen output.
The mxml file
An XML listing for the Flex application named AppBackground01 is shown in Listing 2.
Listing 2. Flex application
namedAppBackground01.
<?xml version="1.0" encoding="utf-8"?>

<mx:Application xmlns:mx="http://www.adobe.com/2006/mxml"

        backgroundColor="#FF0000"
        backgroundGradientColors="[#00FF00, #0000FF]"
        backgroundAlpha="1.0">

</mx:Application>
|
Background color, color gradient, and transparency
The output for this application is similar to that shown in Figure 2 except that in this case, the color, color gradient, and transparency for the background is being controlled through the use of the following attributes:
The code in Listing 2 sets the backgroundColor attribute value to pure red using the hexadecimal notation #FF0000.
A few words about color
For those who may not be familiar with this concept, the overall background color is controlled by a mixture of different contributions of the red, green, and blue primary colors. For example, pure red plus pure blue produces a color commonly known as magenta. Pure green plus pure blue produces cyan. Pure red plus pure green produces yellow. Pure red plus pure green plus pure blue produces white. The absence of all three colors produces black.
Three eight-bit bytes
The values for red, green, and blue respectively are specified by the values of three eight-bit bytes. The value of each byte can range from 0 to 255 decimal (00 to FF in hexadecimal). A value of 0 means that the primary color is not included in the mixture and a value of 255 or FF means that the primary color is included full strength in the mixture.
Using this scheme, it is possible to generate more than sixteen million different colors.
A color gradient
The order of the red, green, and blue contributions to the overall color in hexadecimal notation is RRGGBB.
The application shown in Listing 2 sets the backgroundGradientColors to range from pure green (#00FF00) at the top of the output window to pure blue (#0000FF) at the bottom. As mentioned earlier, the application sets the backgroundColor to pure red using the hexadecimal notation #FF0000.
Alpha
The appearance of the resulting mix of colors can be controlled by changing the value of backgroundAlpha, with allowable values ranging between 0.0 and 1.0. (In other programming systems, alpha is often allowed to vary between 0 and 255 decimal, or between #00 and #FF hexadecimal.)
Transparency or opacity
Once again, for those not familiar with this concept, the value of alpha specifies a transparency or opacity level. When an attempt is made to draw two pixels with different colors at the same location on the screen, the color of the last pixel drawn will be completely opaque and will dominate if it has an alpha value of 1.0. In that case, the first pixel drawn will no longer be visible.
If the last pixel drawn has an alpha value of 0, it will be totally transparent and the first pixel drawn will be totally visible.
For values in between 0.0 and 1.0, the first pixel drawn will show through to some extent and the final color of the pixel will be a mix of the colors of the two pixels.
Four runs with different alpha values
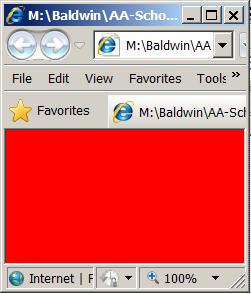
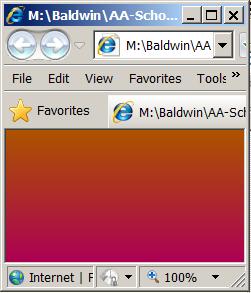
For this example, the application was modified, compiled, and run four times in succession by substituting four different values of backgroundAlpha into the code in Listing 2. The results are shown in Figure 3
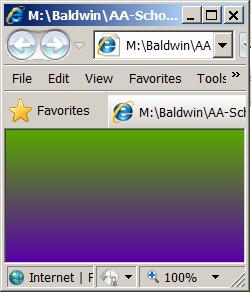
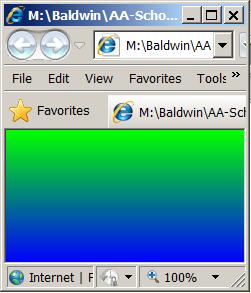
Figure 3. Application window background for alpha values of 0.0, 0.33, 0.66, and 1.0.
 |
 |
 |
 |
Four output images
The four images shown in Figure 3, going from left to right, top to bottom, represent alpha values of 0.0, 0.33, 0.66, and 1.0 respectively.
An alpha value of 0.0
For an alpha value of 0.0, the output color is pure red as shown by the top-left image in Figure 3. In this case, the gradient color scheme is totally transparent.
An alpha value of 1.0
For an alpha value of 1.0, the output colors range from pure green at the top to pure blue at the bottom as shown in the bottom-right image in Figure 3. In this case, the gradient color scheme is totally opaque and the red background color doesn't show through at all.
Alpha values of 0.33 and 0.66
For alpha values of 0.33 and 0.66, the output is a mix of the red background and the green/blue gradient as shown by the top-right and bottom-left images in Figure 3.
(The image in the bottom-left corner of Figure 3 corresponds to what you should see if you run the online version of this application as described earlier.)
Conclusion
These results suggest that the alpha value specified by backgrounAlpha applies to the colors specified by backgroundGradientColors and does not apply to the color specified by backgroundColor.
In other words, the gradient colors can be made more or less transparent by changing the value of backgroundAlpha allowing the red backgroundColor to show through the gradient colors. However, the value of alpha doesn't appear to affect the background color.
If you modify the code in Listing 2 by removing the backgroundColor attribute, and then compile and run it for different values of alpha, you will see a similar result. In that case, however, the resulting colors will be a mixture of the default gray background color shown in Figure 1 and the green/blue gradient shown in the bottom right corner of Figure 3.
I encourage you to run the online version of the program. Then copy the code from Listing 2. Use that code to create a Flex project. Compile and run the project. Experiment with the code, making changes, and observing the results of your changes. Make certain that you can explain why your changes behave as they do.
In this lesson, you learned a little about what Adobe Flex is and why I am publishing this series of tutorial lessons.
You learned how to download and install Adobe Flex Builder 3 and how to get started developing Flex projects.
You learned a little about the Flex Builder IDE and the Flex 3.4 documentation.
You learned how to write a Flex application that controls the color, color gradient, and transparency of the background of the main window when the application is played in Flash Player (version 9 or later).
Copyright 2009, Richard G. Baldwin. Reproduction in whole or in part in any form or medium without express written permission from Richard Baldwin is prohibited.
Richard has participated in numerous consulting projects and he frequently provides onsite training at the high-tech companies located in and around Austin, Texas. He is the author of Baldwin's Programming Tutorials, which have gained a worldwide following among experienced and aspiring programmers. He has also published articles in JavaPro magazine.
In addition to his programming expertise, Richard has many years of practical experience in Digital Signal Processing (DSP). His first job after he earned his Bachelor's degree was doing DSP in the Seismic Research Department of Texas Instruments. (TI is still a world leader in DSP.) In the following years, he applied his programming and DSP expertise to other interesting areas including sonar and underwater acoustics.
Richard holds an MSEE degree from Southern Methodist University and has many years of experience in the application of computer technology to real-world problems.
-end-