Figure 2 Successful server operation.
Published: October 2, 2004
Revised: January 28, 2005 to correct color error in Listing 2.
By Richard G. Baldwin
Java Programming, Notes # 679
The purpose of this document is twofold:
If you have ever suffered the pain of searching through the Apache Jakarta Tomcat documentation trying to figure out how to deploy a simple servlet and a simple JSP document on a Tomcat container, you can appreciate the importance of Marty Hall's contribution to the world of clarity. Fortunately, because of his contribution, you may never have to suffer that pain.
As a professor of computer studies at Austin Community College in Austin, Texas, I teach several courses in Java and Object-Oriented programming. In one of those courses, which covers about ten major topics in a sixteen-week semester, our students need to learn how to design, write, and test Java servlets both with and without database connections via JDBC. Because of the large number of topics covered in a short period of time, the students simply don't have the time available to develop expertise in deploying web applications.
Thus, the students need a way to deploy and test their servlets with a minimum of effort in the deployment process.
What is the Apache Jakarta Tomcat 5 Servlet/JSP Container?
Sun has this to say about Apache Tomcat:
"Tomcat is a free, open-source implementation of Java Servlet and JavaServer Pages technologies developed under the Jakarta project at the Apache Software Foundation. Tomcat is available for commercial use under the ASF license from the Apache web site in both binary and source versions.
Sun adapts and integrates the Tomcat code base into the J2EE SDK and owns and evolves the JavaServer Pages and Java Servlets specifications under the Java Community Process."
Attractive for teaching purposes
Tomcat is attractive for teaching purposes, because it is freely available to all students, and because it is endorsed by Sun.
As I mentioned earlier, however, the Tomcat documentation is arcane and convoluted. It appears to have been written by experts to be consumed by experts, instead of having been written by experts to be consumed by those those with less expertise who need the information.
Marty Hall to the rescue
Fortunately, Marty Hall has published an excellent web site explaining how to install and configure Tomcat, and how to deploy servlets and JSP documents on Tomcat with a minimum of effort.
Perhaps more importantly, he has provided a link where students can download a preconfigured version of Tomcat 5, which eliminates the requirement for configuration following installation (normally, configuration entails making numerous editing changes to XML files).
Preconfigured versions
As of this writing in September of 2004, preconfigured versions are available for Tomcat 4 and Tomcat 5. These preconfigured Tomcat versions:
The remainder of the document
The remainder of this document will provide detailed instructions for my students on:
Although this information is intended primarily for my students, I am publishing it on a public web server because I believe that others may benefit from the information as well.
Marty Hall describes two different ways to install and configure Jakarta Tomcat:
The second option is recommended
Although his step-by-step configuration instructions are detailed, the fact that the instructions apply to two different versions (4 and 5) can occasionally lead to some confusion. In addition, the configuration effort represents a lot of work with numerous opportunities for making mistakes. Therefore, unless there is a particular reason for you to elect the first option given above, I recommend that you elect the second option.
Here is what I did to download and install the preconfigured version of Tomcat 5.
Download and save the zip file
I downloaded the preconfigured zip file for Tomcat 5 from http://www.coreservlets.com/Apache-Tomcat-Tutorial/#Preconfigured-Tomcat.
Then I saved the zip file in an archive folder for backup and later access if needed.
(One of the most difficult aspects of rebuilding a crashed system is going out on the web to find and install all of the software that was installed on your computer before the crash.)
Extract and position the contents of the zip file
I extracted the contents of the zip file into a temporary directory. This produced the following items in the temporary directory:
Update environment variables
I used the dialog accessible from the control panel to update the following environment variables as indicated.
Create start and stop icons on desktop
The folder named c:\jakarta-tomcat-5.0.27\bin contains the following two batch files:
As you might guess from the names, these two batch files are used to start and stop the Tomcat server. For convenience, I created desktop icons with shortcuts to these two batch files. This makes it easy to start and stop the server by double-clicking on the respective icon on the desktop.
Unless I have forgotten to include something, if you follow these instructions, Tomcat 5 should be ready for use at this point with the features provided in the above list of preconfigured features.
Start the server running
To test the installation to see if it is working, double-click the start icon that you placed on your desktop (or double-click the file named startup.bat mentioned earlier). This should cause a command-line window to appear containing a lot of text. The text in the window should end with something like the text shown in Figure 1.
Sep 28, 2004 8:43:01 PM org.apache.catalina.startup.Catalina start INFO: Server startup in 21731 ms Figure 1 |
If you see the text shown in Figure 1, that means that your server is running. Furthermore because of one of the preconfigured features, the server is listening for HTTP requests on port 80 (instead of 8080, which is the installation default).
Test for a successful connection on localhost
To test for a successful connection on localhost, enter the following URL in your browser:
http://localhost/
If everything is working correctly, a page similar to that shown in Figure 2 should appear in your browser window.
|
Once you see that, you can probably conclude that Tomcat 5 is working properly as a localhost server on your computer listening for connection requests on port 80.
Stop and browse the page
While you are there, stop and examine the page showing in your browser window. It is packed with information regarding Tomcat 5, including the source code for numerous servlet and JSP examples.
Deploying servlets and JSP documents on Tomcat
Before I show you how to deploy servlets and JSP documents on Tomcat, I need to show you how to upgrade your Java J2SE installation to support the creation of servlet programs.
As of September 2004, I am currently using Java 2 SDK 1.4.2. This Java distribution does not include two packages that are required for compiling servlets:
Two different ways to upgrade
I know of two ways to upgrade a J2SE installation to include these two packages:
Installing J2EE may be an overkill
If you have other needs for J2EE, that is probably the best way to go. However, if you are solely interested in the classes for the javax.servlet and javax.servlet.http packages, downloading and installing J2EE is probably overkill. Since I don't currently have any other need for J2EE, I elected the second option.
Download and install the two servlet packages
Here is what I did:
Once again, unless I left something out, if you follow these instructions, you should be ready at this point to write, compile, and deploy a simple servlet and a simple JSP document on the Tomcat servlet/JSP container.
Start by compiling the servlet code shown in Listings 1 and 2 producing the compiled bytecode files named Inew2338_050.class and Inew2338_051.class.
/*File Inew2338_050.java,
Copyright 2004, R.G.Baldwin

The purpose of this program is to illustrate a
very simple servlet.

The servlet was tested using Jakarta Tomcat 5 as
localhost along with the Java servlet packages
version 2.1.1 running under WinXP.

The servlet produces the following text in the
browser window in large red letters.

Hello Big Red World
************************************************/
import java.io.*;
import javax.servlet.*;
import javax.servlet.http.*;

public class Inew2338_050 extends HttpServlet{
  public void doGet(HttpServletRequest req,
                    HttpServletResponse res)
                    throws ServletException,
                                     IOException{

    res.setContentType("text/html");
    PrintWriter out = res.getWriter();

    out.println("<HTML>");
    out.println(
     "<HEAD><TITLE>Inew2338_050</TITLE></HEAD>");
    out.println("<BODY>");

    out.println("<h1 align=\"center\">"
                    +"<font color=\"#FF0000\">");
    out.println("Hello Big Red World");
    out.println("</font></h1>");

    out.println("</BODY></HTML>");
  }//end doGet()
}//end class Inew2338_050

Listing 1
|
/*File Inew2338_051.java,
Copyright 2004, R.G.Baldwin

Updated 01/28/05 to correct an error having
 to do with color.  Originally, the text
 was displayed in blue instead of green.

The purpose of this program is to illustrate a
very simple servlet.

The servlet was tested using Jakarta Tomcat 5 as
localhost along with the Java servlet packages
version 2.1.1 running under WinXP.

The servlet produces the following text in the
browser window in large green letters.

Hello Big Green World
************************************************/
import java.io.*;
import javax.servlet.*;
import javax.servlet.http.*;

public class Inew2338_051 extends HttpServlet{
  public void doGet(HttpServletRequest req,
                    HttpServletResponse res)
                    throws ServletException,
                                     IOException{

    res.setContentType("text/html");
    PrintWriter out = res.getWriter();

    out.println("<HTML>");
    out.println(
     "<HEAD><TITLE>Inew2338_051</TITLE></HEAD>");
    out.println("<BODY>");

    out.println("<h1 align=\"center\">"
                    +"<font color=\"#00FF00\">");
    out.println("Hello Big Green World");
    out.println("</font></h1>");

    out.println("</BODY></HTML>");
  }//end doGet()
}//end class Inew2338_051

Listing 2
|
Deploy the servlets
Start the Tomcat 5 server if it isn't already running.
(This is important to test the servlet reloading feature described in the above list of features.)
Copy the two compiled class files into the following folder in the Tomcat tree:
c:\jakarta-tomcat-5.0.27\webapps\ROOT\WEB-INF\classes
Test the deployment
Making sure that the Tomcat 5 server is running, enter the following URL into your browser:
http://localhost/servlet/Inew2338_050
This should produce an output in your browser window that looks like that shown in Figure 3.
|
Access a second servlet
Then enter the following URL into your browser:
http://localhost/servlet/Inew2338_051
This should produce an output in your browser window that looks like that shown in Figure 4.
|
If you can replicate these results, that means that you now have the ability to deploy simple packageless servlets in Tomcat 5.
(Marty Hall also provides information on how to deploy and test the deployment of servlets that use packages as well as servlets that use packages and utility classes. I will refer you to his page for instructions for dealing with those kinds of servlets.)
Create a JSP document file
Listing 3 contains the text of a very simple JSP document.
<!--File Inew2338_052.jsp -->

<html>
  <title>My title</title>
     <body>
     <H1>My First JSP Page</H1>
     <H2>Hello, JSP world!</H2>

     <% for (int i=0; i<6; i++) { %>
         <br>
         <%= i %>
     <% }//end for loop %>

     <H3>Isn't this fun</H3>

     </body>
</html>

Listing 3
|
Copy this text into a file named Inew2338_052.jsp.
Deploy the JSP document
Copy the file into the following folder in the Tomcat tree.
c:\jakarta-tomcat-5.0.27\webapps\ROOT
Test the deployment
Enter the following URL into your browser, making sure that the Tomcat server is running:
http://localhost/Inew2338_052.jsp
This should produce an output in your browser window that looks like that shown in Figure 5.
|
Congratulations
If you see the output shown in Figure 5, you have just deployed a JSP document on the Tomcat 5 servlet/JSP container.
Thanks to Marty Hall
I began the lesson by expressing my sincere appreciation to Marty Hall for freely sharing his expertise on Jakarta Tomcat with the rest of us.
Needed, a simple way to deploy servlets and JSP documents
Then I explained why students in my Advanced Java class need to be able to deploy servlets and JSP documents without first becoming experts in web application deployment technology.
Why use Apache Jakarta Tomcat?
Then I explained why I have selected Apache Jakarta Tomcat as the reference servlet/JSP container for use by students in my Advanced Java class.
Along the way I complained a little about the quality of the documentation for the Tomcat servlet/JSP container.
Outstanding instructions from Marty Hall
I explained that Marty Hall has published an excellent web site explaining how to install and configure Tomcat, and how to deploy servlets and JSP documents on Tomcat with a minimum of effort.
A preconfigured version of Tomcat 5
I also explained that he has provided a link where students can download a preconfigured version of Tomcat, which eliminates the requirement for configuration following installation
Downloading, installing, and testing preconfigured Tomcat 5
Then I explained how to download and install the preconfigured version of Tomcat 5 as a localhost server on a Windows system. After that, I explained how to start the Tomcat 5 server running, and how to confirm that it is accepting HTTP requests on port 80.
Upgrading a J2SE installation to compile servlets
At that point, I departed from my discussion of Tomcat 5 and explained how to upgrade a Java 2 Standard Edition 1.4.2 installation to make it possible to compile servlets. This involves downloading and installing a small jar file and associated documentation from Sun.
How to deploy packageless servlets on Tomcat 5
Then I showed how to deploy simple packageless servlets on the Tomcat 5 servlet/JSP container by copying compiled servlet program files into the following folder in the Tomcat tree:
c:\jakarta-tomcat-5.0.27\webapps\ROOT\WEB-INF\classes
I provided two sample servlets that you can compile and use to test your system.
How to deploy a JSP document on Tomcat 5
Then I showed how to deploy a simple JSP document on the Tomcat 5 servlet/JSP container by copying JSP files into the following folder in the Tomcat tree.
c:\jakarta-tomcat-5.0.27\webapps\ROOT
I provided a sample JSP document that you can use to test your system.
Confirming proper operation of Tomcat 5
For both servlets and JSP documents, I showed you how to use your browser to confirm that your system is behaving properly.
Then I congratulated you on your successful installation of Tomcat 5 and the successful deployment of servlets and JSP documents on that servlet/JSP container.
Copyright 2004, Richard G. Baldwin. Reproduction in whole or in part in any form or medium without express written permission from Richard Baldwin is prohibited.
Richard has participated in numerous consulting projects, and he frequently provides onsite training at the high-tech companies located in and around Austin, Texas. He is the author of Baldwin's Programming Tutorials, which has gained a worldwide following among experienced and aspiring programmers. He has also published articles in JavaPro magazine.
In addition to his programming expertise, Richard has many years of practical experience in Digital Signal Processing (DSP). His first job after he earned his Bachelor's degree was doing DSP in the Seismic Research Department of Texas Instruments. (TI is still a world leader in DSP.) In the following years, he applied his programming and DSP expertise to other interesting areas including sonar and underwater acoustics.
Richard holds an MSEE degree from Southern Methodist University and has many years of experience in the application of computer technology to real-world problems.
-end-
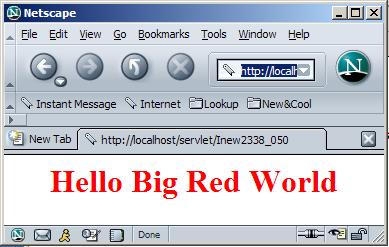 Figure 3
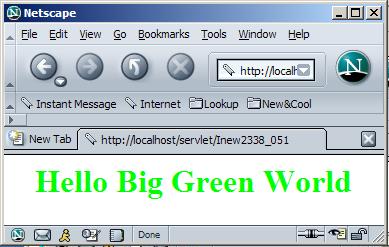 Figure 4
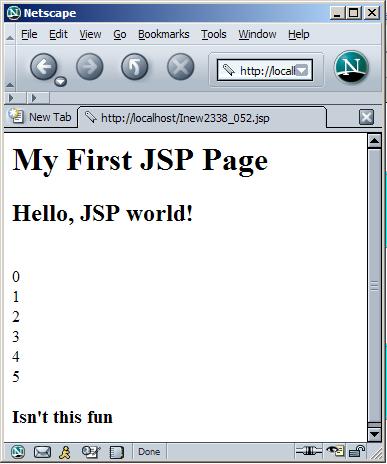 Figure 5