
Published: February 10, 2009
By Richard G. Baldwin
Java Programming Notes # 351
This lesson is the next in a series (see Resources) designed to teach you how to write Java programs to do things like:
If you have ever wondered how to do these things, you've come to the right place.
If you have studied the earlier lessons in this series, you have learned:
You will learn how to write a Java program to apply a blurring or softening filter to your digital photos with the amount of softening being controlled by a slider.
In addition, you will learn how to write a general-purpose slider-controlled programming template that makes it relatively easy to apply slider control to a variety of digital image-processing tasks
I recommend that you open another copy of this document in a separate browser window and use the following links to easily find and view the figures and listings while you are reading about them.
I recommend that you also study the other lessons in my extensive collection of online programming tutorials. You will find a consolidated index at www.DickBaldwin.com.
In this series of lessons, I will present and explain many of the classes in a multimedia class library that was developed and released under a Creative Commons Attribution 3.0 United States License (see Resources) by Mark Guzdial and Barbara Ericson at Georgia Institute of Technology. In doing this, I will also present some interesting sample programs that use the library.
I explained how to download, install, and test the multimedia class library in an earlier lesson titled Multimedia Programming with Java, Getting Started (see Resources).
Three programs
I will present and explain three different programs in this lesson. In the first program, I will show you how to write a general-purpose template program in which some attribute of a digital image is varied through a range of values using a slider. The results of varying the attributes are immediately visible in a display of the image for which the attributes are being varied as shown in Figure 1.
Purpose of the template program
The main purpose of this template program is to make it possible for you to write image processing programs with a minimum of effort. Ideally, by using this template, you will be able to concentrate on the image-processing logic of such programs and not have to deal with the logistics involved in the overall program.
A blurring or softening filter
The purpose of the second and third programs is to teach you how to write a program to apply a blurring or softening filter to your digital photos with the amount of softening being controlled by a slider. Once again, the results are visible in a display of the image to which the softening filter is being applied as shown in Figure 3.
A more aggressive blurring filter
The third program is very similar to the second program. However, the third program applies a much more aggressive blurring algorithm to the image. In other words, much more blurring occurs for the same travel distance of the slider as shown by the comparative output images in Figure 4.
This is a template program, designed to teach you how to structure a program in which some attribute of a digital image is varied through a range of values using a slider.
The main purpose
The main purpose of this programming template is to make it possible for you to write image processing programs with a minimum of effort. Ideally, by using this template, you will be able to concentrate on the image-processing logic and not have to deal with the logistics involved in the overall program. Note that the template program requires access to Ericson's multimedia library.
Programming and image processing concepts
The speed and smoothness of programs that you write using this template program will depend on a combination of your programming skills and the speed of your computer.
This template program is intended to teach programming and image processing concepts. It is not intended to make it possible for you to write programs that will compete on a speed and convenience basis with commercially-available photograph processing programs such as Adobe Photoshop Elements.
A two-part screen output
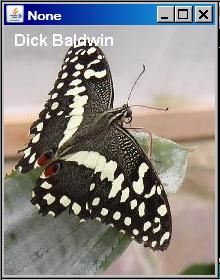
The screen output produced by the template program consists of the two parts shown in Figure 1:
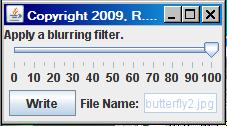
Figure 1. Sample output from SingleSliderTemplate01.
|
|
The GUI
More specifically, the GUI consists of the following components:
Backup image files
Each time the user click the button in the GUI, a backup image file containing a copy of the current state of the display is written into the same directory from which the original image file was read.
Five backup files are saved
The five most recent backup files are saved. The backup files are written in bmp format regardless of the format of the original image file in order to avoid the color corruption that can occur when images are compressed into JPEG format.
The names of the backup files
The names of the backup files are the same as the name of the original image file except that BAKn is inserted immediately ahead of the extension where n is a digit ranging from 0 to 4. The value of n rolls over and starts back at 0 when it exceeds 4.
Support for different input file types
Input files of type jpg, bmp, and png are supported. Other image-file types may be supported also but the program has only been tested for the three image-file types listed above.
Location of the GUI
The GUI appears in the upper-left corner of the screen when the program starts running. At this point, both the slider and the button are disabled.
When the user enters the name of the input file, a display of the image contained in that file appears in the upper-left corner of the screen and the GUI is relocated to a position immediately below the display.
When the GUI is ready for image processing
When the GUI is relocated to the position below the display, the slider and the button are enabled and the text field is disabled.
The width of the GUI is changed to match the width of the display if possible. For example, this is possible in Figure 1 where the display and the GUI have the same width. However, if the width of the display is less than the preferred width of the GUI, the GUI appears at its preferred width. This is the case in Figure 3 where the width of the GUI is a little greater than the width of the display of the butterfly above it.
Location of input files
If the input file is in the current directory, only the file name and extension must be entered into the text field. Otherwise, a complete path and file name with extension must be entered by the user.
Behavior of the demonstration program
The minimum, maximum, and starting point for the slider is easily controlled through program code.
For this demonstration program, the slider ranges from 0 to 100 with the initial position of the slider at 100. As the slider is moved toward zero, the value of the red color component for every pixel in the image is reduced linearly and the display changes to reflect that change in the value of the red color component. (The smoothness or lack thereof of the operation will depend on the speed of the computer.)
When the slider is at the 0 position (full left), the pixels in the image are completely devoid of red color.
Writing a backup file
Positioning the slider at some point along its range and clicking the Write button causes a backup file to be written containing the current state of the display.
Terminating the program
Clicking the large X in the upper-right corner of the display doesn't terminate the program. It simply hides the display and is of no practical value. The program is terminated by clicking the large X in the upper-right corner of the GUI.
Writing the final output file
Before terminating, the program writes an output file containing the final state of the display in the same format as the input file.
The name of the final output file is the same as the name of the original input file except that the word FINAL is inserted immediately ahead of the extension. (Note that this program does not modify the contents of the original input file.)
A ChangeListener object
A ChangeListener object is registered on the slider. Each time the slider fires a ChangeEvent, the event handler creates a new display, which is a copy of the original picture. Then it calls a method named processThePicture. This method is where you should write your image processing code.
Using the template program
The main purpose of this template program is to make it possible for you to write image processing programs with a minimum of effort. For many different kinds of image processing programs, you should be able to confine your programming effort to the following three tasks and leave the remainder of the template program intact.
Will explain in fragments
I will explain this program code in fragments. A complete listing of the program is provided in Listing 19 near the end of the lesson.
The program begins in Listing 1.
Listing 1. Beginning of the program named SingleSliderTemplate01.
public class SingleSliderTemplate01 extends JFrame{
  private JPanel mainPanel = new JPanel();
  private JPanel southPanel = new JPanel();

  private JLabel purposeLabel =
                new JLabel("Purpose of Slider goes Here");
  private JButton writeButton = new JButton("Write");
  private JTextField fileNameField =
             new JTextField("SingleSliderTemplate01.jpg");
  //This slider will extend from 0 to 100 with the initial
  // position at 100. See the documentation to learn how
  // to configure it differently.
  private JSlider slider = new JSlider(0,100,100);

  //A reference to the original Picture object will be
  // stored here.
  private Picture picture = null;
  //A reference to a modified copy of the original
  // Picture object will be stored here.
  private Picture display = null;

  //Miscellaneous working variables.
  private Image image = null;
  private Graphics graphics = null;

  private Pixel pixel = null;
  private int red = 0;
  private int writeCounter = 0;

  private Pixel[] pixels = null;

  private String fileName = "NONE";
  private String outputPath = null;
  private String extension = null;
  //----------------------------------------------------//

  public static void main(String[] args){
    new SingleSliderTemplate01();
  }//end main method
  //----------------------------------------------------//
|
Listing 1 consists of the declaration of a large number of instance variables and a very simple main method. The embedded comment should suffice to tell you what you need to know at this point about the instance variables and the main method.
Beginning of the constructor for the template program
The constructor for the template program begins in Listing 2.
Listing 2. Beginning of the constructor for SingleSliderTemplate01.
  public SingleSliderTemplate01(){//constructor

    //All close operations are handled in a WindowListener
    // object.
    setDefaultCloseOperation(
                     WindowConstants.DO_NOTHING_ON_CLOSE);

    //Put the decorations on the slider. See the
    // documentation to learn how to decorate the slider
    // differently.
    slider.setMajorTickSpacing(10);
    slider.setMinorTickSpacing(5);
    slider.setPaintTicks(true);
    slider.setPaintLabels(true);

    //Construct the GUI.
    mainPanel.setLayout(new BorderLayout());

    mainPanel.add(purposeLabel,BorderLayout.NORTH);
    mainPanel.add(slider,BorderLayout.CENTER);

    southPanel.add(writeButton);
    southPanel.add(new JLabel("File Name:"));
    southPanel.add(fileNameField);
    mainPanel.add(southPanel,BorderLayout.SOUTH);

    //Disable the slider and the writeButton until the
    // user enters the file name. Put the focus on the
    // text field where the user will enter the file
    // name.
    slider.setEnabled(false);
    writeButton.setEnabled(false);
    fileNameField.requestFocus();

    //Set the size of the GUI and display it in the upper-
    // left corner of the screen. It will be moved later
    // to a position immediately below the display of the
    // picture.
    getContentPane().add(mainPanel);
    pack();
    setVisible(true);
|
While Listing 2 is rather long and tedious, it is not complicated. Hopefully you can understand everything in Listing 2 without further explanation from me.
Registration of an ActionListener on the text field
Things start to get interesting in Listing 3, which begins the process of registering an ActionListener object on the text field.
When the user enters the file name in the text field, the actionPerformed method that begins in Listing 3 is executed.
The code in the actionPerformed method sets everything up properly so that the program will function as an event-driven picture-manipulation program until the user clicks the large X in the upper-right corner of the GUI.
Listing 3. Registration of an ActionListener on the text field.
fileNameField.addActionListener(
new ActionListener(){
public void actionPerformed(ActionEvent e){
//Disable the text field to prevent the user
// from entering anything else in it.
fileNameField.setEnabled(false);
//Get the file name from the text field and use
// it to create a new Picture object. Display my
// name in the image.
fileName = fileNameField.getText();
picture = new Picture(fileName);
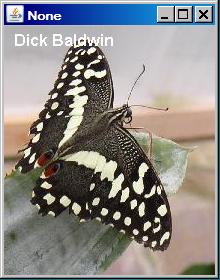
picture.addMessage("Dick Baldwin",10,20);
|
Straightforward code
The code in Listing 3 is relatively straightforward. Assuming that you know about anonymous classes and event-driven programming in Java, and assuming that you have studied the earlier lessons in this series, you should have no difficulty understanding the code in Listing 3.
Write first copy of backup file
Continuing with the code in the actionPerformed method, the code in Listing 4 writes the first copy of a backup file into the same directory from which the input file was read.
Listing 4. Write first copy of backup file.
          //Get information that will be used to write the
          // output files.
          String inputPath = new File(fileName).
                                        getAbsolutePath();
          int posDot = inputPath.lastIndexOf('.');
          outputPath = inputPath.substring(0,posDot);
          //Write the first copy of the output backup
          // file.
          picture.write(outputPath
                       + "BAK" + writeCounter++ + ".bmp");
|
What is the issue here?
The big issue in Listing 4 is getting a programmatic handle on the directory from which the input file was read. Some of the code in Listing 4 may be new to you, particularly if you haven't done a lot of file IO in Java. All I can tell you is that if you will pull out the trusty Sun documentation and look up the class and method names used in Listing 4, it should all make sense.
Be aware, however, that the write method that is called in the last statement in Listing 4 is a method of Ericson's Picture class. You won't find it in Sun's standard library. Also note that the writeCounter variable that we saw in Listing 1 is used to construct the output file name and is incremented immediately after it is used.
Get filename extension and decorate the GUI
Listing 5 gets and saves the filename extension to be used later when the final output file is written. Listing 5 also sets a title on the GUI.
Listing 5. Get filename extension and decorate the GUI.
          //Get filename extension. It will be used later
          // to write the final output file.
          extension = inputPath.substring(posDot);

          //Decorate the GUI.
          setTitle("Copyright 2009, R.G.Baldwin");
|
Create the display picture
Listing 6 instantiates a new Picture object having the same dimensions at the image that was read from the input file and stores the object's reference in an instance variable named display.
Listing 6. Create the display picture.
          //Create the picture that will be processed.
          // Note that the original image file is not
          // modified by this program.
          int pictureWidth = picture.getWidth();
          int pictureHeight = picture.getHeight();
          display = new Picture(
                              pictureWidth,pictureHeight);
|
This is the Picture object that will be modified by the method named processThePicture later. The image that you see in Figure 1 is contained in this object.
Neither the original image file nor the Picture object created from the image file are modified by this program.
Draw the initial display
Listing 7 copies the image from the original Picture object onto the Picture object referred to by display.
Listing 7. Draw the initial display and show it.
          //Draw the initial display.
          graphics = display.getGraphics();
          graphics.drawImage(picture.getImage(),0,0,null);

          display.show();
|
Then Listing 7 calls the show method on the display picture to display it in the format shown in the top image in Figure 1.
Adjust the width and relocate the GUI
Listing 8 relocates the GUI to a position immediately below the display. In the process, Listing 8 attempts to change the width of the GUI to make it match the display. However, if the display is too narrow for the GUI, this effort is abandoned and the GUI is displayed in its preferred width.
Listing 8. Adjust the width and relocate the GUI.
          //Adjust the width of the GUI to match the width
          // of the display if possible. Then relocate the
          // GUI to a position immediately below the
          // display.
          //Establish the preferred size now that the
          // input file name has been entered.
          pack();
          int packedHeight = getHeight();
          int packedWidth = getWidth();
          if((pictureWidth + 7) >= packedWidth){
            //Make the width of the GUI the same as the
            // width of the display.
            setSize(pictureWidth + 7,packedHeight);
          }//Else, just leave the GUI at its current size.
          //Put the GUI in its new location immediately
          // below the display.
          setLocation(0,pictureHeight + 30);
|
Enable the slider and the button
Listing 9 enables the slider and the button to prepare the GUI for use in processing the image. Note that the text field was disabled at the beginning of Listing 3. The user has only one opportunity to enter a file name in this program. To process a second image file, it is necessary to terminate and restart the program.
Listing 9. Enable the slider and the button.
          //Enable the user input controls.
          slider.setEnabled(true);
          writeButton.setEnabled(true);

        }//end actionPerformed
      }//end new ActionListener
    );//end addActionListener
|
Listing 9 also signals the end of the registration of the ActionListener object on the text field. Once the registration is complete, the program simply waits for the user to enter a file name in the text field. When the user enters the file name into the text field, the code in the actionPerformed method that began in Listing 3 and ended in Listing 9 is executed. Once the actionPerformed method terminates, the program simply waits for the user to either move the slider or click the button in the GUI.
Register an ActionListener on the Write button
Speaking of clicking the button in the GUI, Listing 10 registers an ActionListener object on that button to define what will happen when the user clicks the button.
Listing 10. Register an ActionListener on the Write button.
    writeButton.addActionListener(
      new ActionListener(){
        public void actionPerformed(ActionEvent e){
          display.write(outputPath
                       + "BAK" + writeCounter++ + ".bmp");
          //Reset the writeCounter if it exceeds 4 to
          // conserve disk space.
          if(writeCounter > 4){
            writeCounter = 0;
          }//end if
        }//end action performed
      }//end newActionListener
    );//end addActionListener
|
Write an output file
Each time the user clicks the button in the GUI shown in Figure 1, a backup image file of type bmp containing the current state of the display is written into the directory from which the original picture was read. Although a bmp file is larger in size than a jpg file, a bmp file was chosen in place of a jpg file to avoid the color corruption that can occur when an image is compressed into a jpg file.
Five backup files are saved
The five most recent backup files are saved. The names of the backup files are the same as the name of the original input file except that BAKn is inserted immediately ahead of the extension. The character n is a digit ranging from 0 to 4. The value of n rolls over at 4 and starts back at 0.
Given the above description and the embedded comments, you should have no difficulty understanding the code in Listing 10.
Register a WindowListener object on the JFrame object
Listing 11 registers a WindowListener object on the JFrame object (that constitutes the GUI) to define what will happen when the user clicks the large X in the upper-right corner of the GUI.
Listing 11. Register a WindowListener object on the JFrame object.
    addWindowListener(
      new WindowAdapter(){
        public void windowClosing(WindowEvent e){
          display.write(outputPath + "FINAL" + extension);
          System.exit(0);
        }//end windowClosing
      }//end new WindowAdapter
    );//end addWindowListener
|
When that happens, the windowClosing method shown in Listing 11 will be executed. This method will write the final state of the display into an output file of the same type as the original input file. The name will be the same as the name of the input file except that the word FINAL will be inserted immediately ahead of the extension.
Then the windowClosing method will cause the program to terminate.
Register a ChangeListener object on the JSlider object
We have finally made our way to the reason for the existence of this template program. Listing 12 registers a ChangeListener object on the slider. Each time the user moves the slider, it fires a series of events of type ChangeEvent.
Listing 12. Register a ChangeListener object on the JSlider object.
    slider.addChangeListener(
      new ChangeListener(){
        public void stateChanged(ChangeEvent e){
          //Draw a new copy of the picture on the display.
          graphics = display.getGraphics();
          graphics.drawImage(picture.getImage(),0,0,null);
          processThePicture();
        }//end stateChanged
      }//end new ChangeListener
    );//end addChangeListener
    //--------------------------------------------------//

  }//end constructor
|
Execute the stateChanged method
Each time the slider fires a ChangeEvent, the stateChanged method in Listing 12 is executed. Each time the method is executed, it draws a new copy of the original picture on the Picture object referred to by display and then calls the method named processThePicture.
The intent is that the code in the method named processThePicture will be customized to perform the image processing task that is the purpose of the program and then cause the display to be repainted on the screen.
The processThePicture method
A demonstration version of the method named processThePicture is included in the program named SingleSliderTemplate01. That method is shown in Listing 13.
Listing 13. The processThePicture method for SingleSliderTemplate01.
  private void processThePicture(){
    //Adjust the value of the red color component on the
    // basis of the current value of the slider.
    pixels = display.getPixels();
    for(int cnt = 0;cnt < pixels.length;cnt++){
      red = (int)(pixels[cnt].getRed()
                               * slider.getValue()/100.0);
      pixels[cnt].setRed(red);
    }//end for loop

    display.repaint();

  }//end processThePicture
  //----------------------------------------------------//

}//end class SingleSliderTemplate01
|
A demonstration version
This demonstration version of the method named processThePicture is designed for illustration purposes only. As I explained earlier, the method is called each time the slider fires a stateChanged event. Immediately before this method is called, a new display is created containing a fresh copy of the original picture.
Reduce the red color in the picture
This method operates only on the Picture object referred to by display. Each time this version of the method is called, it gets the current value of the slider and uses that value as a multiplicative factor to reduce the red color value in every pixel in the current display. Depending on the position of the slider when the event is fired, the red color component value for every pixel in the current display will be set to a value ranging from zero to 100 percent of its original value.
Example output
For example, Figure 1 shows the result of using the slider to reduce the red color value of every pixel to 60-percent of its original value.
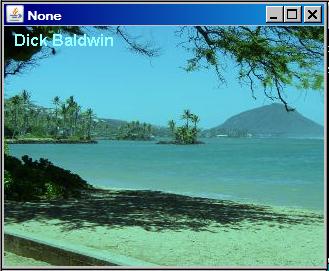
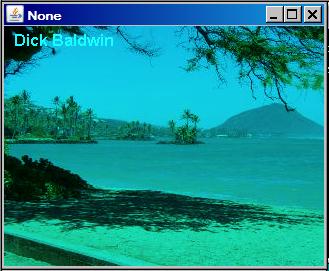
Figure 2 shows the result of using the slider to reduce the red color value of every pixel to ten-percent of its original value. (Note the position of the slider in Figure 1 and Figure 2.)
Figure 2. Red color reduced to ten-percent of its original value.
 |
 |
If you compare Figure 2 with Figure 1, you should be able to see that there is less red in Figure 2 than in Figure 1.
The code is straightforward
Assuming that you have studied the earlier lessons in this series, you should have no difficulty understanding the code in Listing 13.
Leave the original Picture object alone
In most cases, methods that are written for this part of the program using this programming template should not access the original Picture object directly, but should confine their operations to the Picture object referred to by the variable named display.
Now that you have learned all about the programming template, it is time to examine a program based on that template, which accomplishes a task that is commonly performed by persons working to improve digital photographs. This program can be used to blur or soften a digital photograph.
A more complex program
As you might expect, this program is somewhat more complex than the demonstration program discussed above that simply reduced the red color component in all pixels in an image. Fortunately, since you already know all about the template, all I will need to explain for this program is the method named processThePicture, (plus a couple of remarks about minor changes that were made to the template).
As mentioned above, this program was created using code from the program named SingleSliderTemplate01 as the starting point.
Purpose is to blur or soften a digital photo
The purpose of this program is to teach you how to write a program to apply a blurring or softening filter to your digital photos with the amount of softening controlled by the user with a slider. The program requires access to Ericson's multimedia library.
Emphasizes understand over execution speed
The speed and smoothness of programs that you write using the template program will depend on a combination of your programming skills and the speed of your computer. This program was designed to emphasize an understanding of the image blurring process and was not designed for speed. (Improving the speed would be a good project for the students.)
Two minor changes to the template
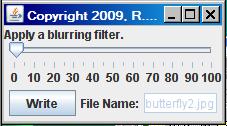
As you learned earlier, the screen output produced by programs based on this template consists of two parts:
For this program, the slider ranges from 0 to 100 with the initial position of the slider at 1 (and not 100). This is one of the minor changes that I made to the template. The other minor change was to change the text that appears above the slider.
|
Many possible blurring algorithms
This program applies one of many possible blurring or softening algorithms to an image that is read from an image file. The algorithm is applied separately to the red, green, and blue color components of the pixels. In other words, each color component is blurred independently of the other two color components but all three are blurred by the same amount.
Comparing two points on the slider
Figure 3 shows the same butterfly output image for two positions of the slider.
Figure 3. Example of blurring a butterfly image.
|
|
|
 |
 |
No blurring versus maximum blurring
I will provide a detailed explanation of the blurring algorithm later. For now, suffice to say that no blurring is applied when the slider is set to the left end at 0. This is illustrated by the two images in the left side of Figure 3. Maximum blurring for this algorithm occurs when the slider is moved to the right end at 100. This is illustrated by the two images in the right side of Figure 3.
Not an aggressive algorithm
This particular algorithm is not particularly aggressive in blurring the image. The algorithm that I will show you in the third program is much more aggressive (see Figure 4). In other words, with the third program, blurring is more pronounced as the slider shown in Figure 3 is moved from the left end toward the right end. Other algorithms can be even more aggressive, producing images that are hardly recognizable when set to maximum blurring.
Writing an output file
As you learned earlier, positioning the slider at some point along its range and clicking the Write button causes a backup file to be written containing the current state of the display.
Terminating the program
Also as you learned earlier, clicking the large X in the upper-right corner of the display simply hides the display and does not terminate the program. The program is terminated by clicking the large X in the upper-right corner of the GUI. Before terminating, the program writes an output file containing the final state of the display in the same graphics format as the input file.
Will explain in fragments
As is my custom, I will explain this program in fragments. A complete listing of the program is provided in Listing 20 near the end of the lesson.
As mentioned earlier, all that I need to explain is the method named processThePicture.
The blurring algorithm
This version of the processThePicture method applies one of many possible blurring or softening algorithms to the image. In technical terms, this method convolves the pixels in the image with a nine-point, two-dimensional convolution filter having very specific characteristics. The convolution filter is applied separately to the red, green, and blue color components of the pixels.
More familiar terminology
Using terminology that may be more familiar to you, each color value for each pixel is replaced by a weighted sum of the color value for that pixel (referred to as the center pixel) and the color values for its eight nearest neighbors. In other words, output pixels are produced as a weighted average of nine adjacent input pixels that form a 3x3 square of pixels.
The values of the weighting factors
Equal weights are applied to each of the eight pixels on the outside of the 3x3 square. A different weight is usually applied to the pixel in the center of the square. The values of the weights are adjusted so that the sum of the weights applied to the center pixel and its eight neighbors is 1.0.
Computing the weighting factors
The current value of the slider is used with a logarithmic algorithm to compute the two weights that are applied to the center pixel and its eight neighbors to produce each output pixel.
For example, when the slider value is 1 or less, a weight of 1.0 is applied to the center pixel and weights of 0.0 are applied to each of the eight neighboring pixels. No blurring occurs for this case.
When the slider value is 100, a weight of 0.0 is applied to the center pixel and weights of 0.125 are applied to the other eight pixels. Maximum blurring occurs for this case.
A table of example weights
A table is provided in the program comments in Listing 20 that shows more examples of the relationship between slider values and the weight applied to the center pixel. Given the weight that is applied to the center pixel and knowing that the sum of all nine weights is 1.0, you should be able to calculate the weights that are applied to each of the other eight pixels for each of the slider values in the table.
Blurring versus slider position
As mentioned earlier, there is no blurring when the slider is at the far left or 0 position. The farther the slider moves toward the right, the greater is the relative contribution of the eight outer pixels to the weighted sum, and the greater will be the blurring or softening effect. Maximum blurring occurs when the slider is at the far right in the 100 position.
Beginning of the processThePicture method
The processThePicture method begins in Listing 14. The code in Listing 14 uses the current value of the slider to compute the weights that will be applied to the center pixel and to each of its eight nearest neighbors.
Listing 14. Beginning of the processThePicture method for Blur01.
  private void processThePicture(){
    //Compute the weights to be applied to the center
    // pixel and its eight closest neighbors.
    double value = (double)(slider.getValue());
    double centerWeight = 0.0;

    //Convert the slider value to a scaled log value with
    // a maximum value of 1.0.
    if(value > 1.0){
      centerWeight = 1.0 - Math.log10(value)/2;
    }else{
      centerWeight = 1.0 - Math.log10(1.0)/2;
    }//end else

    //Compute the weight that is applied to each of the
    // eight neighboring pixels.
    double neighborWeight = (1.0 - centerWeight)/8.0;
|
If you understand logarithms...
If you understand logarithms, you shouldn't have too much difficulty understanding the code in Listing 14. The bottom line is that when the code in Listing 14 has been executed, two weighting factors have been computed. One weighting factor will be applied to the center pixel in each 3x3 square of nine pixels and the other weighting factor will be applied to the eight pixels at the outer edge of the square.
Why convert to a logarithmic scale?
I'm not going to explain why I converted from a linear scale to a logarithmic scale because such an explanation would require several pages of text and would be beyond the scope of this lesson. If you have a physics or engineering background, you probably already know the answer. If not, suffice it to say that this makes better use of the full traversal length of the slider as an adjustment device in this case.
Working variables
Listing 15 declares some working variables that will be used later in the method.
Listing 15. Working variables.
    //Declare some working varibles.
    int width = display.getWidth();
    int height = display.getHeight();
    int red = 0;
    int green = 0;
    int blue = 0;
    Pixel pixel = null;
    Pixel[] pixels = new Pixel[8];

    //Create a temporary copy of the display to serve as
    // input to the computations that follow. This will
    // prevent the processing of one row from having an
    // influence on the processing of the next row.
    Picture temp = new Picture(display);
|
Listing 15 also creates another copy of the picture and stores its reference in a reference variable named temp. I will explain the use of this copy of the picture later.
Process each 3x3 square of pixels
Listing 16 begins a pair of nested for loops that iterate through the picture, one pixel at a time, processing each 3x3 square of pixels.
Listing 16. Process each 3x3 square of pixels.
    for(int col = 1;col < width-1;col++){
      for(int row = 1;row < height - 1;row++){
        //Get and save the pixel at the center of the
        // current nine-pixel group.
        pixel = display.getPixel(col,row);

        //Get and save the eight surrounding pixels.
        pixels[0] = temp.getPixel(col-1,row-1);
        pixels[1] = temp.getPixel(col,row-1);
        pixels[2] = temp.getPixel(col+1,row-1);

        pixels[3] = temp.getPixel(col-1,row);
        pixels[4] = temp.getPixel(col+1 ,row);

        pixels[5] = temp.getPixel(col-1,row+1);
        pixels[6] = temp.getPixel(col,row+1);
        pixels[7] = temp.getPixel(col+1,row+1);
|
The code inside the inner loop begins by saving a reference to the pixel that is in the center of a 3x3 square containing nine pixels. Then it saves references to the eight pixels that form the border of the 3x3 square in the eight-element array that was created at the end of Listing 15.
Note the indices
Note that the indices in the for loops in Listing 16 begin with 1 (not 0) and end with (width-1) and (height-1). This was done so that the code in the body of the inner loop won't attempt to access pixels that are outside the bounds of the picture. In other words, for this nine-element convolution filter, the pixels in the outermost rows and columns of the image are never used as the center pixel in a 3x3 square of pixels.
Compute the weighted sum of the red color values
The next step is to compute a weighted sum of the red color values of the nine pixels that form a 3x3 square of pixels. The center pixel must be multiplied by the factor named centerWeight that was computed in Listing 14. Each of the other eight pixels must be multiplied by the factor named neighborWeight that was also computed in Listing 14. Then the resulting products must be added.
Listing 17. Compute the weighted sum of the red color values.
        red = 0;

        //First compute the sum of the color values for
        // the eight neighboring pixels.
        for(int cnt = 0;cnt < pixels.length;cnt++){
          red += pixels[cnt].getRed();
        }//end for loop

        //Now apply the weights and store the resulting
        // value in the center pixel of the nine-pixel
        // group in the display.
        red = (int)(red*neighborWeight
                           + pixel.getRed()*centerWeight);
        pixel.setRed(red);
|
Should you multiply first or add first?
Because the eight pixels on the outer edge of the 3x3 square must all be multiplied by the same factor before adding their products, it doesn't matter whether you multiply and then add, or add and then multiply. The numeric result will be the same either way. However, multiplication tends to be more computationally expensive than addition, so from a speed viewpoint, it is better to add and then multiply.
Loop and add the eight red values
Listing 17 uses a for loop to compute the sum of the red values belonging to the eight pixels whose references were stored in the array named temp. These are the pixels from the outer edge of the 3x3 square of pixels.
Then Listing 17 multiplies that sum by the factor neighborWeight and adds that product to the product of centerWeight and the red color value belonging to the pixel that is at the center of the 3x3 square of pixels.
This produces the new red color value, which is stored in the pixel at the center of the 3x3 square of pixels in the display, replacing the value that was originally there.
Do the same for the green and blue colors
Still inside the inner loop, Listing 18 computes new green and blue values for the pixel at the center of the 3x3 square of pixels using exactly the same computational algorithm.
Listing 18. Do the same for the green and blue colors.
        //Compute the weighted average of the green
        // values. This is essentially the same algorithm
        // as for the red values.
        green = 0;
        for(int cnt = 0;cnt < pixels.length;cnt++){
          green += pixels[cnt].getGreen();
        }//end for loop
        green = (int)(green*neighborWeight
                         + pixel.getGreen()*centerWeight);
        pixel.setGreen(green);

        //Compute the weighted average of the blue values.
        // This is essentially the same algorighm as for
        // the red values.
        blue = 0;
        for(int cnt = 0;cnt < pixels.length;cnt++){
          blue += pixels[cnt].getBlue();
        }//end for loop
        blue = (int)(blue*neighborWeight
                          + pixel.getBlue()*centerWeight);
        pixel.setBlue(blue);

      }//end inner loop
    }//end outer loop

    display.repaint();

  }//end processThePicture
  //----------------------------------------------------//

}//end class Blur01
|
Back to the top of the loop
Then control transfers back to the top of the loop. This iteration process continues until every 3x3 square of pixels has been processed. Each 3x3 square of pixels is used to produce one pixel in the output picture referred to by display.
Repaint the display
When the outer loop terminates, Listing 18 repaints the display shown by the top two images in Figure 3 and the method named processThePicture terminates. This returns control to Listing 12, which promptly terminates.
This happens over and over as the user moves the slider causing the JSlider object shown by the bottom two images in Figure 3 to fire stateChanged events.
A complete listing of the program named Blur02 is provided in Listing 21 near the end of the lesson.
Blur02 is an update to the program named Blur01, which causes the blurring algorithm to be more aggressive. As I described in detail above, the program named Blur01 computes a weighted sum of a center pixel and its eight closest neighbors in a 3x3 square of pixels. Blur02 computes a weighted sum of a center pixel and its 24 closest neighbors in a 5x5 square of pixels.
I'm not going to explain the details of the changes in the code that were required to accomplish this, but all the changes were made in the method named processThePicture. You should be able to understand the changes by comparing the method named processThePicture in Listing 20 with the method having the same name in Listing 21.
Comparison of programs Blur01 and Blur02
Figure 4 compares the output images produced by the two programs for four different settings of the slider. The output produced by Blur01 is shown in the left column of images, and the output produced by Blur02 is shown in the right column.
Figure 4. Comparison of programs Blur01 and Blur02.
 |
 |
 |
 |
 |
 |
 |
 |
Starting at the top and going down the page, the pairs of images correspond to slider settings of 0, 33, 66, and 100. A comparison of the bottom pair of images shows that much more blurring occurred with Blur02 (right column) than with Blur01 (left column).
Which blurring algorithm is the best?
It depends entirely on what your needs are which algorithm is the better one for you. If you can accomplish your needs using the algorithm on the left, that is probably the better algorithm for you. Of the two, it is less computationally demanding and runs faster.
On the other hand, if you need more blurring, the second algorithm, or perhaps one that is even more aggressive than that one might be the best one for you.
Keep in mind that there are parameters other than simply the number of pixels included in the weighted sum that can be brought into play when designing the algorithm. However, the design of blurring algorithms is beyond the scope of this lesson.
I encourage you to copy the code from Listing 19 through Listing 21, compile the code, and execute it. Experiment with the code, making changes, and observing the results of your changes. Make certain that you can explain why your changes behave as they do.
See if you can find ways to modify the algorithms so as to improve the speed without changing the behavior. For example, consider using the techniques described in the lesson titled Using the Java 2D ConvolveOp Filter Class to Process Images (see Resources).
I explained three different programs in this lesson. In the first program, I showed you how to write a general-purpose template program in which some attribute of a digital image is varied through a range of values using a slider. The results of varying the attributes are immediately visible in a display of the image for which the attributes are being varied.
The main purpose of this template program is to make it possible for you to write image processing programs with a minimum of effort. Ideally, by using this template, you will be able to concentrate on the image-processing logic of such programs and will not have to deal with the logistics involved in the overall program.
The purpose of the second and third programs is to teach you how to write a program to apply a blurring or softening filter to your digital photos with the amount of softening being controlled by user with a slider.
The third program is very similar to the second program. However, the third program applies a much more aggressive blurring algorithm to the image. In other words, much more blurring occurs for the same travel distance of the slider.
In the next lesson, you will learn how to write an animated flocking program where seven marine creatures chase a lead creature as it moves randomly in an aquarium.
Listing 19. Source code for the program named SingleSliderTemplate01.
/*File SingleSliderTemplate01 Copyright 2009 R.G.Baldwin

This is a template program, designed to show you how to
structure a program in which some attribute of a digital
image is varied through a range of values using a slider.

The main purpose of this template program is to make it
possible for you to write image processing programs with a
minimum of effort. Ideally, by using this template, you
will be able to concentrate on the image-processing logic
and not have to deal with the logistics involved in
the overall program.

The template program requires access to Ericson's
multimedia library.

The speed and smoothness of programs that you write using
this template program will depend on a combination of your
programming skills and the speed of your computer. This
template program is intended to teach programming and
image processing concepts. It is not intended to make it
possible for you to write programs that will compete on a
speed basis with commercially-available photograph
processing programs.

The screen output produced by the template program
consists of two parts: a display of the picture being
processed and a GUI.

The GUI consists of the following components:
~A JLabel object that briefly describes the purpose of the
slider.
~The slider itself.
~A JButton that can be used to write backup copies of the
current state of the display into the same directory from
which the original image file was read. The five most
recent backup files are saved. The backup files are
written in bmp format regardless of the format of the
original image file in order to avoid the color corruption
that can occur when images are compressed into JPEG
format. The names of the backup files are the same as the
name of the original image file except that BAKn is
inserted immediately ahead of the extension where n is a
digit ranging from 0 to 4. The value of n rolls over and
starts back at 0 when it exceeds 4.
~A JTextField into which the user enters the name of the
input file. Files of type jpg, bmp, png are supported.
Other file types may be supported as well but the program
hasn't been tested for types other than those listed
above.

The GUI originally appears in the upper-left corner of the
screen. At this point, both the slider and the button are
disabled. When the user enters the name of the input file,
a display of the image contained in that file appears in
the upper-left corner of the screen and the GUI is
relocated to a position immediately below the display. If
the input file is not in the current directory, a complete
path and file name must be entered by the user.

When the GUI is relocated to the position immediately
below the display, the slider and the button are enabled
and the text field is disabled. The width of the GUI is
changed to match the width of the display unless the width
of the display is less than the preferred width of the
GUI. In that case, the GUI appears at its preferred width.

For this demonstration template program, the slider ranges
from 0 to 100 with the initial position of the slider at
100. As the slider is moved toward zero, the value of the
red color component for every pixel in the image is
reduced linearly and the display changes to reflect that
change in the value of the red color component. The
smoothness, or lack thereof of the operation will depend
on the speed of the computer. When the slider is at the 0
position, the pixels in the image are completely devoid of
red color.

Positioning the slider at some point along its range and
clicking the Write button causes a backup file to be
written containing the current state of the display.

Clicking the large X in the upper-right corner of the
display simply hides the display and is of no practical
value.

The program is terminated by clicking the large X in the
upper-right corner of the GUI. Before terminating, the
program writes an output file containing the final state
of the display in the same format as the input file. The
name of the output file is the same as the name of the
original input file except that the word FINAL is inserted
immediately ahead of the extension.

This program does not modify the contents of the original
input file.

A change listener is registered on the slider. Each time
the slider fires a ChangeEvent, the event handler creates
a new display as a copy of the original picture and calls
a method named processThePicture.

The main purpose of this template program is to make it
possible for you to write image processing programs with a
minimum of effort. For many different kinds of image
processing programs, you should be able to confine your
programming effort to rewriting the method named
processThePicture (and change the text in the JLabel
referred to by purposeLabel) and leave the remainder of
the template program intact.

Tested using Windows Vista Home Premium Edition,
Java 1.6x, and the version of Ericson's multimedia library
contained in bookClasses10-1-07.zip.
*********************************************************/

import java.awt.Graphics;
import java.awt.Image;
import java.awt.BorderLayout;
import java.awt.event.ActionListener;
import java.awt.event.ActionEvent;
import java.awt.event.WindowAdapter;
import java.awt.event.WindowEvent;

import javax.swing.JFrame;
import javax.swing.JPanel;
import javax.swing.JSlider;
import javax.swing.JLabel;
import javax.swing.JButton;
import javax.swing.JTextField;
import javax.swing.event.ChangeListener;
import javax.swing.event.ChangeEvent;
import javax.swing.WindowConstants;

import java.io.File;

public class SingleSliderTemplate01 extends JFrame{
  private JPanel mainPanel = new JPanel();
  private JPanel southPanel = new JPanel();

  private JLabel purposeLabel =
                new JLabel("Purpose of Slider goes Here");
  private JButton writeButton = new JButton("Write");
  private JTextField fileNameField =
             new JTextField("SingleSliderTemplate01.jpg");
  //This slider will extend from 0 to 100 with the initial
  // position at 100. See the documentation to learn how
  // to configure it differently.
  private JSlider slider = new JSlider(0,100,100);

  //A reference to the original Picture object will be
  // stored here.
  private Picture picture = null;
  //A reference to a modified copy of the original
  // Picture object will be stored here.
  private Picture display = null;

  //Miscellaneous working variables.
  private Image image = null;
  private Graphics graphics = null;

  private Pixel pixel = null;
  private int red = 0;
  private int writeCounter = 0;

  private Pixel[] pixels = null;

  private String fileName = "NONE";
  private String outputPath = null;
  private String extension = null;
  //----------------------------------------------------//

  public static void main(String[] args){
    new SingleSliderTemplate01();
  }//end main method
  //----------------------------------------------------//

  public SingleSliderTemplate01(){//constructor

    //All close operations are handled in a WindowListener
    // object.
    setDefaultCloseOperation(
                     WindowConstants.DO_NOTHING_ON_CLOSE);

    //Put the decorations on the slider. See the
    // documentation to learn how to decorate the slider
    // differently.
    slider.setMajorTickSpacing(10);
    slider.setMinorTickSpacing(5);
    slider.setPaintTicks(true);
    slider.setPaintLabels(true);

    //Construct the GUI.
    mainPanel.setLayout(new BorderLayout());

    mainPanel.add(purposeLabel,BorderLayout.NORTH);
    mainPanel.add(slider,BorderLayout.CENTER);

    southPanel.add(writeButton);
    southPanel.add(new JLabel("File Name:"));
    southPanel.add(fileNameField);
    mainPanel.add(southPanel,BorderLayout.SOUTH);

    //Disable the slider and the writeButton until the
    // user enters the file name. Put the focus on the
    // text field where the user will enter the file
    // name.
    slider.setEnabled(false);
    writeButton.setEnabled(false);
    fileNameField.requestFocus();

    //Set the size of the GUI and display it in the upper-
    // left corner of the screen. It will be moved later
    // to a position immediately below the display of the
    // picture.
    getContentPane().add(mainPanel);
    pack();
    setVisible(true);
    //--------------------------------------------------//

    //Register a listener on the text field. When the user
    // enters the file name in the text field, set
    // everything up properly so that the program will
    // function as an event-driven picture-manipulation
    // program until the user clicks the large X in the
    // upper-right of the GUI.
    fileNameField.addActionListener(
      new ActionListener(){
        public void actionPerformed(ActionEvent e){
          //Disable the text field to prevent the user
          // from entering anything else in it.
          fileNameField.setEnabled(false);

          //Get the file name from the text field and use
          // it to create a new Picture object. Display my
          // name in the image.
          fileName = fileNameField.getText();
          picture = new Picture(fileName);
          picture.addMessage("Dick Baldwin",10,20);

          //Get information that will be used to write the
          // output files.
          String inputPath = new File(fileName).
                                        getAbsolutePath();
          int posDot = inputPath.lastIndexOf('.');
          outputPath = inputPath.substring(0,posDot);
          //Write the first copy of the output backup
          // file.
          picture.write(outputPath
                       + "BAK" + writeCounter++ + ".bmp");

          //Get filename extension. It will be used later
          // to write the final output file.
          extension = inputPath.substring(posDot);

          //Decorate the GUI.
          setTitle("Copyright 2009, R.G.Baldwin");

          //Create the picture that will be processed.
          // Note that the original image file is not
          // modified by this program.
          int pictureWidth = picture.getWidth();
          int pictureHeight = picture.getHeight();
          display = new Picture(
                              pictureWidth,pictureHeight);

          //Draw the initial display.
          graphics = display.getGraphics();
          graphics.drawImage(picture.getImage(),0,0,null);
          display.show();

          //Adjust the width of the GUI to match the width
          // of the display if possible. Then relocate the
          // GUI to a position immediately below the
          // display.
          //Establish the preferred size now that the
          // input file name has been entered.
          pack();
          int packedHeight = getHeight();
          int packedWidth = getWidth();
          if((pictureWidth + 7) >= packedWidth){
            //Make the width of the GUI the same as the
            // width of the display.
            setSize(pictureWidth + 7,packedHeight);
          }//Else, just leave the GUI at its current size.
          //Put the GUI in its new location immediately
          // below the display.
          setLocation(0,pictureHeight + 30);

          //Enable the user input controls.
          slider.setEnabled(true);
          writeButton.setEnabled(true);

        }//end actionPerformed
      }//end new ActionListener
    );//end addActionListener
    //--------------------------------------------------//

    //Register an ActionListener on the writeButton.
    // Each time the user clicks the button, a backup bmp
    // file containing the current state of the display is
    // written into the directory from which the original
    // picture was read. The five most recent backup files
    // are saved. The names of the backup files are the
    // same as the name of the input file except that BAKn
    // is inserted immediately ahead of the extension
    // where n is a digit ranging from 0 to 4. The value
    // of n rolls over at 4 and starts back at 0.
    writeButton.addActionListener(
      new ActionListener(){
        public void actionPerformed(ActionEvent e){
          display.write(outputPath
                       + "BAK" + writeCounter++ + ".bmp");
          //Reset the writeCounter if it exceeds 4 to
          // conserve disk space.
          if(writeCounter > 4){
            writeCounter = 0;
          }//end if
        }//end action performed
      }//end newActionListener
    );//end addActionListener
    //--------------------------------------------------//

    //Register a WindowListener that will respond when the
    // user clicks the large X in the upper-right corner
    // of the GUI. This event handler will write the final
    // state of the display into an output file of the
    // same type as the original input file. The name will
    // be the same except that the word FINAL will be
    // inserted immediately ahead of the extension.
    addWindowListener(
      new WindowAdapter(){
        public void windowClosing(WindowEvent e){
          display.write(outputPath + "FINAL" + extension);
          System.exit(0);
        }//end windowClosing
      }//end new WindowAdapter
    );//end addWindowListener
    //--------------------------------------------------//
    //Register a ChangeListener object on the slider.
    //Each time the slider fires a ChangeEvent, this event
    // handler creates a new display as a copy of the
    // original picture and calls a method named
    // processThePicture.
    slider.addChangeListener(
      new ChangeListener(){
        public void stateChanged(ChangeEvent e){
          //Draw a new copy of the picture on the display.
          graphics = display.getGraphics();
          graphics.drawImage(picture.getImage(),0,0,null);
          processThePicture();
        }//end stateChanged
      }//end new ChangeListener
    );//end addChangeListener
    //--------------------------------------------------//

  }//end constructor
  //----------------------------------------------------//

  //This version of the method named processThePicture is
  // designed for illustration purposes only. The method
  // is called each time the slider fires a stateChanged
  // event.
  //Immediately before this method is called, a new
  // display is created as a copy of the original picture.
  // This method operates only on the display. Each time
  // the method is called, it gets the value of the
  // slider and uses that value as a multiplicative factor
  // to reduce the red color component value in every
  // pixel in the current display. Thus, depending on the
  // position of the slider when the event is fired, the
  // red color component value for every pixel in the
  // current display will be set to a value ranging from
  // zero to 100 percent of its original value. Methods
  // that are written for this part of the program should
  // never access the original Picture object directly,
  // but should confine their operations to the Picture
  // object referred to by the variable named display.

  private void processThePicture(){
    //Adjust the value of the red color component on the
    // basis of the current value of the slider.
    pixels = display.getPixels();
    for(int cnt = 0;cnt < pixels.length;cnt++){
      red = (int)(pixels[cnt].getRed()
                               * slider.getValue()/100.0);
      pixels[cnt].setRed(red);
    }//end for loop

    display.repaint();

  }//end processThePicture
  //----------------------------------------------------//

}//end class SingleSliderTemplate01
|
Listing 20. Source code for the program named Blur01.
/*File Blur01 Copyright 2009 R.G.Baldwin

This program was created using the program named
SingleSliderTemplate01 as the starting point.

The purpose of this program is to teach you how to write a
slider-driven program to apply a blurring or softening
filter to your digital photos with the amount of softening
being controlled by a slider.

The  program requires access to Ericson's multimedia
library.

The speed and smoothness of programs that you write using
the template program will depend on a combination of your
programming skills and the speed of your computer. This
program was designed to emphasize an understanding of the
image blurring process and was not designed for speed.
Improving the speed would be a good project for the
student.

The screen output produced by the program consists of two
parts: a display of the picture being processed and a GUI.

See the comments at the beginning of the program named
SingleSliderTemplate01 for a detailed discussion of the
components in the GUI.

For this program, the slider ranges from 0 to 100 with the
initial position of the slider at 1.  The program applies
one of many possible blurring or softening algorithms to
an image that is read from an image file. The algorithm is
applied separately to the red, green, and blue color
components of the pixels.

A detailed description of the algorithm is provided in the
comments at the beginning of the method named
processThePicture. There is no blurring when the slider is
at the far left or 0 position.  Blurring increases non-
linearly as the slider is moved to the right. Maximum
blurring occurs when the slider is at the far right in the
100 position.

Positioning the slider at some point along its range and
clicking the Write button causes a backup file to be
written containing the current state of the display. See
the program named SingleSliderTemplate01 for information
regarding the number of sequential backup files that are
saved and the names of those files.

Clicking the large X in the upper-right corner of the
display simply hides the display and is of no practical
value.

The program is terminated by clicking the large X in the
upper-right corner of the GUI. Before terminating, the
program writes an output file containing the final state
of the display in the same format as the input file. The
name of the output file is the same as the name of the
input file except that the word FINAL is inserted
immediately ahead of the extension.

This program does not modify the contents of the original
input file.

Tested using Windows Vista Home Premium Edition,
Java 1.6x, and the version of Ericson's multimedia library
contained in bookClasses10-1-07.zip.
*********************************************************/

import java.awt.Graphics;
import java.awt.Image;
import java.awt.BorderLayout;
import java.awt.event.ActionListener;
import java.awt.event.ActionEvent;
import java.awt.event.WindowAdapter;
import java.awt.event.WindowEvent;

import javax.swing.JFrame;
import javax.swing.JPanel;
import javax.swing.JSlider;
import javax.swing.JLabel;
import javax.swing.JButton;
import javax.swing.JTextField;
import javax.swing.event.ChangeListener;
import javax.swing.event.ChangeEvent;
import javax.swing.WindowConstants;

import java.io.File;

public class Blur01 extends JFrame{
  private JPanel mainPanel = new JPanel();
  private JPanel southPanel = new JPanel();

  private JLabel purposeLabel =
                   new JLabel("Apply a blurring filter.");
  private JButton writeButton = new JButton("Write");
  private JTextField fileNameField =
             new JTextField("Blur01.jpg");
  //This slider will extend from 0 to 100 with the initial
  // position at 1. See the documentation to learn how
  // to configure it differently.
  private JSlider slider = new JSlider(0,100,1);

  //A reference to the original Picture object will be
  // stored here.
  private Picture picture = null;
  //A reference to a modified copy of the original
  // Picture object will be stored here.
  private Picture display = null;

  //Miscellaneous working variables.
  private Image image = null;
  private Graphics graphics = null;

  private Pixel pixel = null;
  private int red = 0;
  private int writeCounter = 0;

  private Pixel[] pixels = null;

  private String fileName = "NONE";
  private String outputPath = null;
  private String extension = null;
  //----------------------------------------------------//

  public static void main(String[] args){
    new Blur01();
  }//end main method
  //----------------------------------------------------//

  public Blur01(){//constructor

    //All close operations are handled in a WindowListener
    // object.
    setDefaultCloseOperation(
                     WindowConstants.DO_NOTHING_ON_CLOSE);

    //Put the decorations on the slider. See the
    // documentation to learn how to decorate the slider
    // differently.
    slider.setMajorTickSpacing(10);
    slider.setMinorTickSpacing(5);
    slider.setPaintTicks(true);
    slider.setPaintLabels(true);

    //Construct the GUI.
    mainPanel.setLayout(new BorderLayout());

    mainPanel.add(purposeLabel,BorderLayout.NORTH);
    mainPanel.add(slider,BorderLayout.CENTER);

    southPanel.add(writeButton);
    southPanel.add(new JLabel("File Name:"));
    southPanel.add(fileNameField);
    mainPanel.add(southPanel,BorderLayout.SOUTH);

    //Disable the slider and the writeButton until the
    // user enters the file name. Put the focus on the
    // text field where the user will enter the file
    // name.
    slider.setEnabled(false);
    writeButton.setEnabled(false);
    fileNameField.requestFocus();

    //Set the size of the GUI and display it in the upper-
    // left corner of the screen. It will be moved later
    // to a position immediately below the display of the
    // picture.
    getContentPane().add(mainPanel);
    pack();
    setVisible(true);
    //--------------------------------------------------//

    //Register a listener on the text field. When the user
    // enters the file name in the text field, set
    // everything up properly so that the program will
    // function as an event-driven picture-manipulation
    // program until the user clicks the large X in the
    // upper-right of the GUI.
    fileNameField.addActionListener(
      new ActionListener(){
        public void actionPerformed(ActionEvent e){
          //Disable the text field to prevent the user
          // from entering anything else in it.
          fileNameField.setEnabled(false);

          //Get the file name from the text field and use
          // it to create a new Picture object. Display my
          // name in the image.
          fileName = fileNameField.getText();
          picture = new Picture(fileName);
          picture.addMessage("Dick Baldwin",10,20);

          //Get information that will be used to write the
          // output files.
          String inputPath = new File(fileName).
                                        getAbsolutePath();
          int posDot = inputPath.lastIndexOf('.');
          outputPath = inputPath.substring(0,posDot);
          //Write the first copy of the output backup
          // file.
          picture.write(outputPath
                       + "BAK" + writeCounter++ + ".bmp");

          //Get filename extension. It will be used later
          // to write the final output file.
          extension = inputPath.substring(posDot);

          //Decorate the GUI.
          setTitle("Copyright 2009, R.G.Baldwin");

          //Create the picture that will be processed.
          // Note that the original image file is not
          // modified by this program.
          int pictureWidth = picture.getWidth();
          int pictureHeight = picture.getHeight();
          display = new Picture(
                              pictureWidth,pictureHeight);

          //Draw the initial display.
          graphics = display.getGraphics();
          graphics.drawImage(picture.getImage(),0,0,null);
          display.show();

          //Adjust the width of the GUI to match the width
          // of the display if possible. Then relocate the
          // GUI to a position immediately below the
          // display.
          //Establish the preferred size now that the
          // input file name has been entered.
          pack();
          int packedHeight = getHeight();
          int packedWidth = getWidth();
          if((pictureWidth + 7) >= packedWidth){
            //Make the width of the GUI the same as the
            // width of the display.
            setSize(pictureWidth + 7,packedHeight);
          }//Else, just leave the GUI at its current size.
          //Put the GUI in its new location immediately
          // below the display.
          setLocation(0,pictureHeight + 30);

          //Enable the user input controls.
          slider.setEnabled(true);
          writeButton.setEnabled(true);

        }//end actionPerformed
      }//end new ActionListener
    );//end addActionListener
    //--------------------------------------------------//

    //Register an ActionListener on the writeButton.
    // Each time the user clicks the button, a backup bmp
    // file containing the current state of the display is
    // written into the directory from which the original
    // picture was read. The five most recent backup files
    // are saved. The names of the backup files are the
    // same as the name of the input file except that BAKn
    // is inserted immediately ahead of the extension
    // where n is a digit ranging from 0 to 4. The value
    // of n rolls over at 4 and starts back at 0.
    writeButton.addActionListener(
      new ActionListener(){
        public void actionPerformed(ActionEvent e){
          display.write(outputPath
                       + "BAK" + writeCounter++ + ".bmp");
          //Reset the writeCounter if it exceeds 4 to
          // conserve disk space.
          if(writeCounter > 4){
            writeCounter = 0;
          }//end if
        }//end action performed
      }//end newActionListener
    );//end addActionListener
    //--------------------------------------------------//

    //Register a WindowListener that will respond when the
    // user clicks the large X in the upper-right corner
    // of the GUI. This event handler will write the final
    // state of the display into an output file of the
    // same type as the original input file. The name will
    // be the same except that the word FINAL will be
    // inserted immediately ahead of the extension.
    addWindowListener(
      new WindowAdapter(){
        public void windowClosing(WindowEvent e){
          display.write(outputPath + "FINAL" + extension);
          System.exit(0);
        }//end windowClosing
      }//end new WindowAdapter
    );//end addWindowListener
    //--------------------------------------------------//
    //Register a ChangeListener object on the slider.
    //Each time the slider fires a ChangeEvent, this event
    // handler creates a new display as a copy of the
    // original picture and calls a method named
    // processThePicture.
    slider.addChangeListener(
      new ChangeListener(){
        public void stateChanged(ChangeEvent e){
          //Draw a new copy of the picture on the display.
          graphics = display.getGraphics();
          graphics.drawImage(picture.getImage(),0,0,null);
          processThePicture();
        }//end stateChanged
      }//end new ChangeListener
    );//end addChangeListener
    //--------------------------------------------------//

  }//end constructor
  //----------------------------------------------------//

  //This version of the processThePicture method applies
  // one of many possible blurring or softening algorithms
  // to the image. In pure technical terms, this method
  // convolves the pixels in the image with a nine-point,
  // two-dimensional convolution filter having very
  // specific characteristics. The convolution filter is
  // applied separately to the red, green, and blue color
  // components of the pixels.
  //Using terminology that may be more familiar to you,
  // each color component value for each pixel is replaced
  // by a weighted sum of the color component value for
  // that pixel (referred to as the center pixel) and the
  // color component values for its eight closest
  // neighbors. Equal weights are applied to each of the
  // eight neighbors. The sum of the weights applied to
  // the center pixel and its eight neighbors is 1.0.
  //The current value of the slider is used with a
  // logarithmic algorithm to compute the set of weights
  // that are applied to the pixel and its eight
  // neighbors. For example, when the slider value is 0 or
  // 1, a weight of 1.0 is applied to the center pixel and
  // weights of 0.0 are applied to the neighbors. For this
  // case, no blurring occurs.
  //The following table shows a sampling of the
  // relationship between slider values in the first
  // column and the weight applied to the center pixel in
  // the second column.
  //   0 1.00
  //   1 1.00
  //   2 0.85
  //   4 0.70
  //   8 0.55
  //  16 0.40
  //  32 0.25
  //  50 0.15
  //  75 0.06
  // 100 0.00
  //Given the weight that is applied to the center pixel
  // and knowing that the sum of all nine weights is 1.0,
  // you should be able to calculate the weights that are
  // applied to the neighboring pixels.
  //There is no blurring when the slider is at the far
  // left or 0 position.  The farther to the right the
  // slider moves, the greater will be the relative
  // contribution of the eight neighboring pixels to the
  // weighted sum, and the greater will be the blurring or
  // softening effect. Maximum blurring occurs when the
  // slider is at the far right in the 100 position.
  private void processThePicture(){
    //Compute the weights to be applied to the center
    // pixel and its eight closest neighbors.
    double value = (double)(slider.getValue());
    double centerWeight = 0.0;

    //Convert the slider value to a scaled log value with
    // a maximum value of 1.0.
    if(value > 1.0){
      centerWeight = 1.0 - Math.log10(value)/2;
    }else{
      centerWeight = 1.0 - Math.log10(1.0)/2;
    }//end else

    //Compute the weight that is applied to each of the
    // eight neighboring pixels.
    double neighborWeight = (1.0 - centerWeight)/8.0;

    //Declare some working varibles.
    int width = display.getWidth();
    int height = display.getHeight();
    int red = 0;
    int green = 0;
    int blue = 0;
    Pixel pixel = null;
    Pixel[] pixels = new Pixel[8];

    //Create a temporary copy of the display to serve as
    // input to the computations that follow. This will
    // prevent the processing of one row from having an
    // influence on the processing of the next row.
    Picture temp = new Picture(display);

    //Process each pixel.
    for(int col = 1;col < width -1;col++){
      for(int row = 1;row < height - 1;row++){
        //Get and save the pixel at the center of the
        // current nine-pixel group.
        pixel = display.getPixel(col,row);

        //Get and save the eight surrounding pixels.
        pixels[0] = temp.getPixel(col-1,row-1);
        pixels[1] = temp.getPixel(col,row-1);
        pixels[2] = temp.getPixel(col+1,row-1);

        pixels[3] = temp.getPixel(col-1,row);
        pixels[4] = temp.getPixel(col+1 ,row);

        pixels[5] = temp.getPixel(col-1,row+1);
        pixels[6] = temp.getPixel(col,row+1);
        pixels[7] = temp.getPixel(col+1,row+1);

        //Compute the weighted average of the red values.
        red = 0;
        //First compute the sum of the color values for
        // the eight neighboring pixels.
        for(int cnt = 0;cnt < pixels.length;cnt++){
          red += pixels[cnt].getRed();
        }//end for loop
        //Now apply the weights and store the resulting
        // value in the center pixel of the nine-pixel
        // group in the display.
        red = (int)(red*neighborWeight
                           + pixel.getRed()*centerWeight);
        pixel.setRed(red);

        //Compute the weighted average of the green
        // values. This is essentially the same algorighm
        // as for the red values.
        green = 0;
        for(int cnt = 0;cnt < pixels.length;cnt++){
          green += pixels[cnt].getGreen();
        }//end for loop
        green = (int)(green*neighborWeight
                         + pixel.getGreen()*centerWeight);
        pixel.setGreen(green);

        //Compute the weighted average of the blue values.
        // This is essentially the same algorighm as for
        // the red values.
        blue = 0;
        for(int cnt = 0;cnt < pixels.length;cnt++){
          blue += pixels[cnt].getBlue();
        }//end for loop
        blue = (int)(blue*neighborWeight
                          + pixel.getBlue()*centerWeight);
        pixel.setBlue(blue);

      }//end inner loop
    }//end outer loop

    display.repaint();

  }//end processThePicture
  //----------------------------------------------------//

}//end class Blur01
|
Listing 21. Source code for the program named Blur02.
/*File Blur02 Copyright 2009 R.G.Baldwin

This is an update to the program named Blur01 to make the
blurring algorithm more aggressive. The program named
Blur01 computes a weighted sum of a center pixel and its
eight closest neighbors. This program computes a weighted
sum of a center pixel and its 24 closest neighbors.

This program was created using the program named
SingleSliderTemplate01 as the starting point.

The purpose of this program is to teach you how to write a
slider-driven program to apply a blurring or softening
filter to your digital photos with the amount of softening
being controlled by a slider.

The  program requires access to Ericson's multimedia
library.

The speed and smoothness of programs that you write using
the template program will depend on a combination of your
programming skills and the speed of your computer. This
program was designed to emphasize an understanding of the
image blurring process and was not designed for speed.
Improving the speed would be a good project for the
student.

The screen output produced by the program consists of two
parts: a display of the picture being processed and a GUI.

See the comments at the beginning of the program named
SingleSliderTemplate01 for a detailed discussion of the
components in the GUI.

For this program, the slider ranges from 0 to 100 with the
initial position of the slider at 1.  The program applies
one of many possible blurring or softening algorithms to
an image that is read from an image file. The algorithm is
applied separately to the red, green, and blue color
components of the pixels.

A detailed description of the algorithm is provided in the
comments at the beginning of the method named
processThePicture. There is no blurring when the slider is
at the far left or 0 position.  Blurring increases non-
linearly as the slider is moved to the right. Maximum
blurring occurs when the slider is at the far right in the
100 position.

Positioning the slider at some point along its range and
clicking the Write button causes a backup file to be
written containing the current state of the display. See
the program named SingleSliderTemplate01 for information
regarding the number of sequential backup files that are
saved and the names of those files.

Clicking the large X in the upper-right corner of the
display simply hides the display and is of no practical
value.

The program is terminated by clicking the large X in the
upper-right corner of the GUI. Before terminating, the
program writes an output file containing the final state
of the display in the same format as the input file. The
name of the output file is the same as the name of the
input file except that the word FINAL is inserted
immediately ahead of the extension.

This program does not modify the contents of the original
input file.

Tested using Windows Vista Home Premium Edition,
Java 1.6x, and the version of Ericson's multimedia library
contained in bookClasses10-1-07.zip.
*********************************************************/

import java.awt.Graphics;
import java.awt.Image;
import java.awt.BorderLayout;
import java.awt.event.ActionListener;
import java.awt.event.ActionEvent;
import java.awt.event.WindowAdapter;
import java.awt.event.WindowEvent;

import javax.swing.JFrame;
import javax.swing.JPanel;
import javax.swing.JSlider;
import javax.swing.JLabel;
import javax.swing.JButton;
import javax.swing.JTextField;
import javax.swing.event.ChangeListener;
import javax.swing.event.ChangeEvent;
import javax.swing.WindowConstants;

import java.io.File;

public class Blur02 extends JFrame{
  private JPanel mainPanel = new JPanel();
  private JPanel southPanel = new JPanel();

  private JLabel purposeLabel =
                   new JLabel("Apply a blurring filter.");
  private JButton writeButton = new JButton("Write");
  private JTextField fileNameField =
             new JTextField("Blur02.jpg");
  //This slider will extend from 0 to 100 with the initial
  // position at 1. See the documentation to learn how
  // to configure it differently.
  private JSlider slider = new JSlider(0,100,1);

  //A reference to the original Picture object will be
  // stored here.
  private Picture picture = null;
  //A reference to a modified copy of the original
  // Picture object will be stored here.
  private Picture display = null;

  //Miscellaneous working variables.
  private Image image = null;
  private Graphics graphics = null;

  private Pixel pixel = null;
  private int red = 0;
  private int writeCounter = 0;

  private Pixel[] pixels = null;

  private String fileName = "NONE";
  private String outputPath = null;
  private String extension = null;
  //----------------------------------------------------//

  public static void main(String[] args){
    new Blur02();
  }//end main method
  //----------------------------------------------------//

  public Blur02(){//constructor

    //All close operations are handled in a WindowListener
    // object.
    setDefaultCloseOperation(
                     WindowConstants.DO_NOTHING_ON_CLOSE);

    //Put the decorations on the slider. See the
    // documentation to learn how to decorate the slider
    // differently.
    slider.setMajorTickSpacing(10);
    slider.setMinorTickSpacing(5);
    slider.setPaintTicks(true);
    slider.setPaintLabels(true);

    //Construct the GUI.
    mainPanel.setLayout(new BorderLayout());

    mainPanel.add(purposeLabel,BorderLayout.NORTH);
    mainPanel.add(slider,BorderLayout.CENTER);

    southPanel.add(writeButton);
    southPanel.add(new JLabel("File Name:"));
    southPanel.add(fileNameField);
    mainPanel.add(southPanel,BorderLayout.SOUTH);

    //Disable the slider and the writeButton until the
    // user enters the file name. Put the focus on the
    // text field where the user will enter the file
    // name.
    slider.setEnabled(false);
    writeButton.setEnabled(false);
    fileNameField.requestFocus();

    //Set the size of the GUI and display it in the upper-
    // left corner of the screen. It will be moved later
    // to a position immediately below the display of the
    // picture.
    getContentPane().add(mainPanel);
    pack();
    setVisible(true);
    //--------------------------------------------------//

    //Register a listener on the text field. When the user
    // enters the file name in the text field, set
    // everything up properly so that the program will
    // function as an event-driven picture-manipulation
    // program until the user clicks the large X in the
    // upper-right of the GUI.
    fileNameField.addActionListener(
      new ActionListener(){
        public void actionPerformed(ActionEvent e){
          //Disable the text field to prevent the user
          // from entering anything else in it.
          fileNameField.setEnabled(false);

          //Get the file name from the text field and use
          // it to create a new Picture object. Display my
          // name in the image.
          fileName = fileNameField.getText();
          picture = new Picture(fileName);
          picture.addMessage("Dick Baldwin",10,20);

          //Get information that will be used to write the
          // output files.
          String inputPath = new File(fileName).
                                        getAbsolutePath();
          int posDot = inputPath.lastIndexOf('.');
          outputPath = inputPath.substring(0,posDot);
          //Write the first copy of the output backup
          // file.
          picture.write(outputPath
                       + "BAK" + writeCounter++ + ".bmp");

          //Get filename extension. It will be used later
          // to write the final output file.
          extension = inputPath.substring(posDot);

          //Decorate the GUI.
          setTitle("Copyright 2009, R.G.Baldwin");

          //Create the picture that will be processed.
          // Note that the original image file is not
          // modified by this program.
          int pictureWidth = picture.getWidth();
          int pictureHeight = picture.getHeight();
          display = new Picture(
                              pictureWidth,pictureHeight);

          //Draw the initial display.
          graphics = display.getGraphics();
          graphics.drawImage(picture.getImage(),0,0,null);
          display.show();

          //Adjust the width of the GUI to match the width
          // of the display if possible. Then relocate the
          // GUI to a position immediately below the
          // display.
          //Establish the preferred size now that the
          // input file name has been entered.
          pack();
          int packedHeight = getHeight();
          int packedWidth = getWidth();
          if((pictureWidth + 7) >= packedWidth){
            //Make the width of the GUI the same as the
            // width of the display.
            setSize(pictureWidth + 7,packedHeight);
          }//Else, just leave the GUI at its current size.
          //Put the GUI in its new location immediately
          // below the display.
          setLocation(0,pictureHeight + 30);

          //Enable the user input controls.
          slider.setEnabled(true);
          writeButton.setEnabled(true);

        }//end actionPerformed
      }//end new ActionListener
    );//end addActionListener
    //--------------------------------------------------//

    //Register an ActionListener on the writeButton.
    // Each time the user clicks the button, a backup bmp
    // file containing the current state of the display is
    // written into the directory from which the original
    // picture was read. The five most recent backup files
    // are saved. The names of the backup files are the
    // same as the name of the input file except that BAKn
    // is inserted immediately ahead of the extension
    // where n is a digit ranging from 0 to 4. The value
    // of n rolls over at 4 and starts back at 0.
    writeButton.addActionListener(
      new ActionListener(){
        public void actionPerformed(ActionEvent e){
          display.write(outputPath
                       + "BAK" + writeCounter++ + ".bmp");
          //Reset the writeCounter if it exceeds 4 to
          // conserve disk space.
          if(writeCounter > 4){
            writeCounter = 0;
          }//end if
        }//end action performed
      }//end newActionListener
    );//end addActionListener
    //--------------------------------------------------//

    //Register a WindowListener that will respond when the
    // user clicks the large X in the upper-right corner
    // of the GUI. This event handler will write the final
    // state of the display into an output file of the
    // same type as the original input file. The name will
    // be the same except that the word FINAL will be
    // inserted immediately ahead of the extension.
    addWindowListener(
      new WindowAdapter(){
        public void windowClosing(WindowEvent e){
          display.write(outputPath + "FINAL" + extension);
          System.exit(0);
        }//end windowClosing
      }//end new WindowAdapter
    );//end addWindowListener
    //--------------------------------------------------//
    //Register a ChangeListener object on the slider.
    //Each time the slider fires a ChangeEvent, this event
    // handler creates a new display as a copy of the
    // original picture and calls a method named
    // processThePicture.
    slider.addChangeListener(
      new ChangeListener(){
        public void stateChanged(ChangeEvent e){
          //Draw a new copy of the picture on the display.
          graphics = display.getGraphics();
          graphics.drawImage(picture.getImage(),0,0,null);
          processThePicture();
        }//end stateChanged
      }//end new ChangeListener
    );//end addChangeListener
    //--------------------------------------------------//

  }//end constructor
  //----------------------------------------------------//

  //This version of the processThePicture method applies
  // one of many possible blurring or softening algorithms
  // to the image. In pure technical terms, this method
  // convolves the pixels in the image with a 25-point,
  // two-dimensional convolution filter having very
  // specific characteristics. The convolution filter is
  // applied separately to the red, green, and blue color
  // components of the pixels.
  //Using terminology that may be more familiar to you,
  // each color component value for each pixel is replaced
  // by a weighted sum of the color component value for
  // that pixel (referred to as the center pixel) and the
  // color component values for its 24 closest
  // neighbors. Equal weights are applied to each of the
  // 24 neighbors. The sum of the weights applied to
  // the center pixel and its 24 neighbors is 1.0.
  //The current value of the slider is used with a
  // logarithmic algorithm to compute the set of weights
  // that are applied to the pixel and its 24
  // neighbors. For example, when the slider value is 0 or
  // 1, a weight of 1.0 is applied to the center pixel and
  // weights of 0.0 are applied to the neighbors. For this
  // case, no blurring occurs.
  //There is no blurring when the slider is at the far
  // left or 0 position.  The farther to the right the
  // slider moves, the greater will be the relative
  // contribution of the 24 neighboring pixels to the
  // weighted sum, and the greater will be the blurring or
  // softening effect. Maximum blurring occurs when the
  // slider is at the far right in the 100 position.
  private void processThePicture(){
    //Compute the weights to be applied to the center
    // pixel and its 24 closest neighbors.
    double value = (double)(slider.getValue());
    double centerWeight = 0.0;

    //Convert the slider value to a scaled log value with
    // a maximum value of 1.0.
    if(value > 1.0){
      centerWeight = 1.0 - Math.log10(value)/2;
    }else{
      centerWeight = 1.0 - Math.log10(1.0)/2;
    }//end else

    //Compute the weight that is applied to each of the
    // twenty-four neighboring pixels.
    double neighborWeight = (1.0 - centerWeight)/24.0;

    //Declare some working varibles.
    int width = display.getWidth();
    int height = display.getHeight();
    int red = 0;
    int green = 0;
    int blue = 0;
    Pixel pixel = null;
    Pixel[] pixels = new Pixel[24];

    //Create a temporary copy of the display to serve as
    // input to the computations that follow. This will
    // prevent the processing of one row from having an
    // influence on the processing of the next row.
    Picture temp = new Picture(display);

    //Process each pixel.
    for(int col = 2;col < width - 2;col++){
      for(int row = 2;row < height - 2;row++){
        //Get and save the pixel at the center of the
        // current nine-pixel group.
        pixel = display.getPixel(col,row);

        //Get and save the 24 neighboring pixels.
        pixels[0] = temp.getPixel(col-2,row-2);
        pixels[1] = temp.getPixel(col-1,row-2);
        pixels[2] = temp.getPixel(col,row-2);
        pixels[3] = temp.getPixel(col+1,row-2);
        pixels[4] = temp.getPixel(col+2,row-2);

        pixels[5] = temp.getPixel(col-2,row-1);
        pixels[6] = temp.getPixel(col-1,row-1);
        pixels[7] = temp.getPixel(col,row-1);
        pixels[8] = temp.getPixel(col+1,row-1);
        pixels[9] = temp.getPixel(col+2,row-1);

        pixels[10] = temp.getPixel(col-2,row);
        pixels[11] = temp.getPixel(col-1,row);
        pixels[12] = temp.getPixel(col+1,row);
        pixels[13] = temp.getPixel(col+2,row);

        pixels[14] = temp.getPixel(col-2,row+1);
        pixels[15] = temp.getPixel(col-1,row+1);
        pixels[16] = temp.getPixel(col,row+1);
        pixels[17] = temp.getPixel(col+1,row+1);
        pixels[18] = temp.getPixel(col+2,row+1);

        pixels[19] = temp.getPixel(col-2,row+2);
        pixels[20] = temp.getPixel(col-1,row+2);
        pixels[21] = temp.getPixel(col,row+2);
        pixels[22] = temp.getPixel(col+1,row+2);
        pixels[23] = temp.getPixel(col+2,row+2);

        //Compute the weighted average of the red values.
        red = 0;
        //First compute the sum of the color values for
        // the 24 neighboring pixels.
        for(int cnt = 0;cnt < pixels.length;cnt++){
          red += pixels[cnt].getRed();
        }//end for loop
        //Now apply the weights and store the resulting
        // value in the center pixel of the nine-pixel
        // group in the display.
        red = (int)(red*neighborWeight
                           + pixel.getRed()*centerWeight);
        pixel.setRed(red);

        //Compute the weighted average of the green
        // values. This is essentially the same algorighm
        // as for the red values.
        green = 0;
        for(int cnt = 0;cnt < pixels.length;cnt++){
          green += pixels[cnt].getGreen();
        }//end for loop
        green = (int)(green*neighborWeight
                         + pixel.getGreen()*centerWeight);
        pixel.setGreen(green);

        //Compute the weighted average of the blue values.
        // This is essentially the same algorighm as for
        // the red values.
        blue = 0;
        for(int cnt = 0;cnt < pixels.length;cnt++){
          blue += pixels[cnt].getBlue();
        }//end for loop
        blue = (int)(blue*neighborWeight
                          + pixel.getBlue()*centerWeight);
        pixel.setBlue(blue);

      }//end inner loop
    }//end outer loop

    display.repaint();

  }//end processThePicture
  //----------------------------------------------------//

}//end class Blur02
|
Copyright 2009, Richard G. Baldwin. Reproduction in whole or in part in any form or medium without express written permission from Richard Baldwin is prohibited.
Richard has participated in numerous consulting projects and he frequently provides onsite training at the high-tech companies located in and around Austin, Texas. He is the author of Baldwin's Programming Tutorials, which have gained a worldwide following among experienced and aspiring programmers. He has also published articles in JavaPro magazine.
In addition to his programming expertise, Richard has many years of practical experience in Digital Signal Processing (DSP). His first job after he earned his Bachelor's degree was doing DSP in the Seismic Research Department of Texas Instruments. (TI is still a world leader in DSP.) In the following years, he applied his programming and DSP expertise to other interesting areas including sonar and underwater acoustics.
Richard holds an MSEE degree from Southern Methodist University and has many years of experience in the application of computer technology to real-world problems.
-end-