Learn how to write a non-interactive animation that shows how to create an illusion of perspective. Also learn about a new text-based format for representing program code.
Published: May 20, 2008
By Richard G. Baldwin
Homeschool Programming Notes # 122
Part of a series
This tutorial lesson is part of a continuing series that is designed specifically for teaching computer programming to homeschool students and their parents. However, everyone is welcome to use the lessons to learn computer programming, homeschool or not.
Time to have some fun
If you have worked through the tutorial lessons up to this point, you have been working hard to learn some of the fundamentals of programming as implemented in Scratch. It's time for a break and time to have some fun. This is the second lesson in the series that departs from teaching fundamentals and teaches the fun side of Scratch.
The illusion of perspective
In this lesson, I will present and explain a non-interactive animation that tells the story of a young boy who is lost on the moon. He wanders around trying to find his way. As he wanders, he gets further and further away from the camera. Various programming tricks will be used to create an illusion of perspective.
A new code format
I will also introduce a new format for explaining code that I haven't used in earlier lessons. In particular, I will provide two different views of the program code. One view, which is shown in Figure 3, is a screen shot of the blocks used to construct the script for one of the sprites in the program. The other view, which is shown in Listing 12, is a text representation of the entire project.
I recommend that you open another copy of this document in a separate browser window and use the following links to easily find and view the figures and listings while you are reading about them.
I recommend that you also study the other lessons in my extensive collection of online programming tutorials. You will find a consolidated index at www.DickBaldwin.com.
According to Wikipedia (see Resources), perspective can be described as follows:
Perspective... in the graphic arts, such as drawing, is an approximate representation, on a flat surface (such as paper), of an image as it is perceived by the eye. The two most characteristic features of perspective are that objects are drawn:
- Smaller as their distance from the observer increases
- Foreshortened: the size of an object's dimensions along the line of sight are relatively shorter than dimensions across the line of sight.
Close to the camera
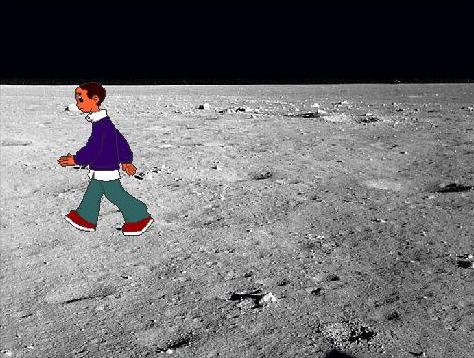
In this lesson, I will show you how to accomplish the first of these two characteristics. Figure 1 shows an image of a boy walking on the moon when he is relatively close to the camera.
Figure 1. Image of the boy walking relatively close to the camera.
|
|
Further from the camera
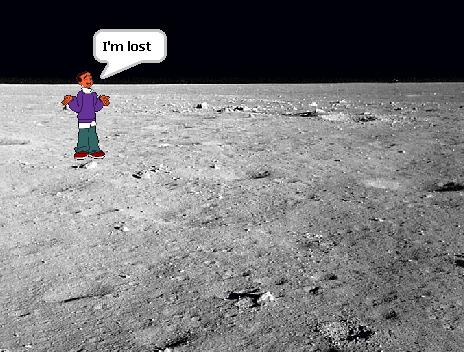
Figure 2 shows the boy turning to talk to the cameraman when he is further from the camera.
Figure 2. Image of the boy relatively far from the camera.
|
|
In this lesson, I will present and explain a non-interactive animation that implements perspective. The animation tells the story of a young boy who is lost on the moon. He wanders around trying to find his way. As he wanders, he gets further and further from the camera. Various tricks are used to create an illusion of perspective.
I will also introduce a new format for explaining code that I haven't used in earlier lessons (Although I may decide to go back and update some of the earlier lessons to include this format). In particular, I will provide two different views of the program code. One view will be that shown in Figure 3, which is a screen shot of the blocks used to construct the scripts for one of the sprites in the program. The other view is that shown in Listing 12, which is a text representation of the entire project.
This text representation was created by holding down the Shift key and clicking the Extras button on the Scratch user interface. However, the raw document created by that process wasn't directly suitable for use in this document, so I did some cleanup on the raw document. The cleanup included the addition of a list of variables and the correction of some formatting problems.
One of the reasons that I decided to start using a text representation of the project is because this makes it possible to include everything that is important in the project in a single listing. This is much more practical than having to present multiple screen shots of different portions of the user interface to cover the entire project as I have done in previous lessons.
Another reason is that the use of a text representation makes it much more practical to extract and explain code fragments, which is the way that I prefer to explain program code. (It is very difficult to extract code fragments from image files containing screen shots of the user interface.)
Will explain some aspects of the text representation
Since this is the first time that I have used this presentation format, I will explain some things about the format as I go along. Each of the code fragments in the following listings were extracted from a complete listing of the project that you will find in Listing 12 near the end of the lesson.
Opening portion of the project listing
Listing 1 shows the opening portion of the listing for the program named Perspective01.
Listing 1. Opening portion of the listing of the program.
Class variables:
    random
    stepSize

Totals:
    Sprites: 2
    Stacks: 5
    Unique costumes: 7
    Unique sounds: 0
|
Listing 1 begins by listing the class variables used in the program. As you will recall from an earlier lesson, a class variable is a variable that is accessible by every script belonging to every sprite in the program. An instance variable, on the other hand, belongs to a particular sprite and is accessible only by the scripts belonging to that sprite. This program doesn't have any instance variables.
The bottom block of text in Listing 1 provides some statistical information about the program. The last two lines should be self-explanatory but the two boldface lines deserve an explanation.
How many sprites are in the program?
Despite the fact that the listing later refers to the Stage as a sprite, the number of sprites given in Listing 1 does not include the Stage as a sprite.
What is a Stack?
In this presentation format, a Stack refers to a stack of programming blocks with a hat block at the top of the stack as shown in Figure 3. This is what I have referred to as a script in earlier lessons, and will continue to refer to as a script when that makes sense. In effect, the information in Listing 1 says that this program contains a total of five different scripts. As you will see later, the Stage owns one script, one of the sprites also owns one script, and the other sprite owns the other three scripts.
Code description of the Stage
Listing 2 indicates that only one costume named moon, is assigned to the Stage in this program. (Recall that stage decorations are called Backgrounds instead of Costumes in the user interface. The terminology produced in the text representation of a project is not entirely consistent with the terminology in the user interface.)
Listing 2. Code description of the Stage.
Sprite: Stage
  Costumes (1):
    moon (480x360)
  Sounds (0):
  Stacks (1):
    when green flag clicked
      switch to background "moon"
    end
|
The costume (background) that belongs to the Stage is the ground upon which the boy is walking in Figure 1 and Figure 3. You will find the image for the moon costume in the gallery of costumes that comes with the Scratch software.
No sounds assigned to the Stage
Listing 2 also indicates that no sounds are assigned to the Stage. (By default, one sound named pop is assigned to the Stage in all new projects. If you forget to delete it, you will see it in a listing of this type but it doesn't cause any harm.)
The Stage owns one stack
Listing 2 also indicates that the Stage owns one stack or script. This script causes the Stage to switch to the moon background (costume) when the user clicks the green flag. (Note that the text that describes each action is very similar to the labels on the blocks, so you should have no difficulty translating the text to the construction of a script using blocks.)
In reality, because the Stage has only one background, the inclusion of the script causing the Stage to switch to that background when the user clicks the green flag is probably superfluous. However, the Stage in many programs has multiple backgrounds, and it is a good idea to get in the habit of establishing the startup background in a script that is executed when the user clicks the green flag.
Two sprites named BoyWalking and BoyShrugging
As mentioned earlier, this program has two sprites in addition to the Stage. The sprite named BoyWalking is the most complex of the two, so I will begin my explanation with that sprite. I will also break the code for this sprite down into fragments for purposes of explanation.
Listing 3 shows the beginning of the listing for the sprite named BoyWalking.
Listing 3. Beginning of the listing for the sprite named BoyWalking.
Sprite: BoyWalking
  Costumes (5):
    boy4-walking-a (110x180)
    boy4-walking-b (110x180)
    boy4-walking-c (110x180)
    boy4-walking-d (110x180)
    boy4-walking-e (110x180)
  Sounds (0):
  Stacks (1):
|
Basically this sprite cycles through five different costumes to produce the illusion of walking. I showed you how to do this in the earlier lesson titled Fun with Scratch, the StarDoors Animation (see Resources). You will find the images for those five costumes in the gallery provided with the Scratch software. You can also view them as the five rightmost costumes in Figure 4.
One script for the sprite named BoyWalking
Listing 3 indicates that the sprite named BoyWalking owns only one script. A screen shot of that script as it appears in the Scratch user interface is shown in Figure 3.
Figure 3. Script belonging to the sprite named BoyWalking.
|
|
Beginning of the script for the sprite named BoyWalking
Listing 4 shows the text representation of the beginning of the script for the sprite named BoyWalking. The portion of the script shown in Listing 4 is used to initialize the sprite when the user clicks the green flag
Listing 4. Beginning of the script for the sprite named BoyWalking.
    when green flag clicked
      switch to costume "boy4-walking-b"
      go to x: -200 y: 0
      point in direction 90
      set size to 100%
      set stepSize to 10
      wait 0.5 secs
      show
|
You should compare the code in Listing 4 with the upper portion of the image shown in Figure 3 to satisfy yourself that both views represent the same script.
Explained in earlier lessons
I have explained all of the code in Listing 4 in earlier lessons (see Resources), so I won't bore you by repeating that explanation here. I will remind you, however, that the use of the terms stepSize and steps in Figure 3 and Listing 4 does not refer to the physical steps being taken by the walking boy. Rather, those terms refer to units of measurement in the coordinate system of the Stage. The Stage is 480 units (steps) wide and 360 units (steps) high.
An online version is available
I have shared my version of this program online (see Resources) so you can either run or download it from there. At this time, I recommend that you go online and run the program in order to become familiar with its behavior.
Shrug and change direction.
When you viewed the running program, you probably noticed that the boy occasionally stopped walking, shrugged his shoulders, said "I'm lost," changed direction, and then resumed walking. This occurs on a completely random basis insofar as time is concerned.
The animation loop
The animation loop for this program begins in Listing 5. The loop will execute the animation code 500 times and then terminate.
The code at the beginning of the animation loop, shown in Listing 5, implements the random shrugging behavior mentioned above.
Listing 5. Beginning of the animation loop.
      repeat 500
        set random to pick random 1 to 40
        if random = 1
          hide
          broadcast "move" and wait
          switch to costume "boy4-walking-d"
          turn  180 degrees
          show
|
Set a variable to a random value
To begin with, at the beginning of each iteration of the animation loop, the value of the variable named random is set to a random number ranging from 1 to 40. Referring back to Figure 3, this statement is created by the first occurrence of a green Numbers block inside an orange Variables block.
Test random number for a value of 1
Then a simple if statement is used to determine if the random value is 1. Assuming that the random numbers are uniformly distributed from 1 to 40, this test should return true only one time in 40 iterations of the animation loop on the average.
If the test does return true, the code in Listing 5 performs the following actions:
Prepare to walk one through one costume change
Regardless of whether or not the test mentioned above tests true, the code in Listing 6 is executed once during each iteration of the animation loop. This code prepares the sprite to walk through one costume change (see costumes in Figure 4).
Listing 6. Prepare to walk one through one costume change.
        set stepSize to stepSize * 0.99
        change y by stepSize / 10
        change size by -0.5
|
Algorithm for creating the illusion of simple walking
If you recall from the previous lesson (see Resources), the procedure for creating the illusion that the boy is walking is to:
If the boy is simply walking across the stage maintaining a fixed distance from the camera, that is pretty much all there is to it.
A more complex scenario
However, that is not the case in this program. As you will recall from running this program online, the boy in this case is moving further and further from the camera as he walks. This requires that we do several other things to produce a convincing illusion that the sprite is walking in a way that takes him further and further from the camera:
Correlating requirements with program code
In keeping with the above requirements:
Take a walk
Once those three actions have been accomplished, we are ready to take the remaining actions necessary to give the illusion of walking as shown in Listing 7.
Listing 7. The sprite named BoyWalking completing a costume change.
        broadcast "shrink" and wait
        move stepSize steps
        next costume
        wait 0.2 secs
        if on edge, bounce
    end
|
Tell the BoyShrugging sprite to shrink a little
Listing 7 begins by sending a "shrink" message to the sprite named BoyShrugging. Even though that sprite is invisible at this time, it must still adjust its overall size in synchronism with the sprite named BoyWalking so that it will be the correct size the next time is becomes visible as a temporary replacement for the walking sprite.
I explained the remaining four statements from Listing 7 in an earlier lesson, so I won't repeat that explanation here.
The end in Listing 7 signals the end of the script belonging to the sprite named BoyWalking.
Statistics for the sprite named BoyShrugging
Listing 8 shows the statistics for the sprite named BoyShrugging, including the fact that this sprite owns 3 stacks (scripts).
Listing 8. Statistics for the sprite named BoyShrugging.
Sprite: BoyShrugging
  Costumes (1):
    boy4-shrugging (134x180)
  Sounds (0):
  Stacks (3):
|
I will present and explain these three scripts in an order that agrees with the order in which I explained the triggers that activate the scripts in the explanation of the script belonging to the script named BoyWalking.
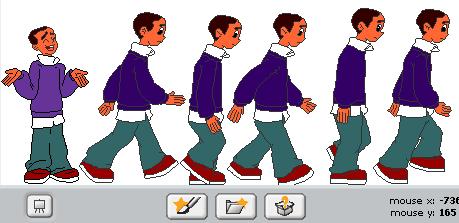
The costume is too small
To begin with, Figure 4 shows the six costumes assigned to the two sprites in this program. The leftmost sprite is assigned to the sprite named BoyShrugging and the remaining five sprites are assigned to the sprite named BoyWalking. As you can see, the artist who drew the shrugging costume drew it too small relative to the five walking costumes. As a result, we must increase the size of the costume slightly to cause this sprite to be the correct size each time it becomes visible.
Figure 4. Six costumes used in this program.
|
|
Increase the size of the costume and hide
The code in Listing 9 increases the size of the costume relative to its actual size when the user clicks the green flag. The new size was determined experimentally to be a pretty good match to the overall sizes of the other five costumes.
Listing 9. Increase the size of the costume and hide.
    when green flag clicked
      set size to 110%
      hide
    end
|
Listing 9 also hides the sprite so that it won't be visible when the program starts running.
Responding to a move message
Recall that the sprite named BoyWalking sent a "move" message in Listing 5 telling the script named BoyShrugging that it was time to become temporarily visible. Prior to sending the message, the BoyWalking sprite made itself invisible.
Listing 10 responds to the "move" message.
Listing 10. Responding to a "move" message.
    when I receive "move"
      go to "BoyWalking "
      show
      say I'm lost for 2 secs
      hide
    end
|
When the sprite named BoyShrugging receives the "move" message, it
Then the BoyWalking sprite takes control again
The script in Listing 10 terminates when it finishes executing. This is the signal for the sprite named BoyWalking to quit waiting, switch to the next costume, turn and face the opposite direction, and make itself visible. (See Listing 5.)
Responding to a "shrink" message
Also recall from Listing 7 that each time the sprite named BoyWalking reduces its overall size, it sends a "shrink" message to the sprite named BoyShrugging. The purpose is to cause the overall size of both sprites to remain the same throughout the animation. The sprite named BoyShrugging responds to the "shrink" message in Listing 11.
Listing 11. Responding to a "shrink" message.
    when I receive "shrink"
      change size by -0.55
    end
|
You may have noticed that the factor by which the sprite named BoyShrugging changes its size in Listing 11 is different from the factor used for the sprite named BoyWalking in Listing 6. I won't get into the details as to exactly why this is required. Suffice it to say that it was made necessary by the fact that the actual size of the shrugging costume is smaller than the actual sizes of the five walking costumes.
That's a wrap
That pretty well wraps it up insofar as explaining this program is concerned.
I encourage you to use the information provided in Listing 12 to write and run this program. Experiment with the code, making changes, and observing the results of your changes. Make certain that you can explain why your changes behave as they do.
I have shared my version of this program online (see Resources) so you can either run or download it from there.
In this lesson, I presented and explained a non-interactive animation that tells the story of a young boy who is lost on the moon. He wanders around trying to find his way. As he wanders, he gets further and further away from the camera. Various programming tricks were used to create an illusion of perspective.
I also introduced a new format for explaining code that I haven't used in earlier lessons. In particular, I provided two different views of the program code. One view, which is shown in Figure 3, is a screen shot of the blocks used to construct the scripts for one of the sprites in the program. The other view, which is shown in Listing 12, is a text representation of the entire project.
In the next lesson, I will present and explain an animation program similar to this one. However, in the next lesson, the boy won't always move away from the camera. Instead, he will follow the mouse pointer, sometimes approaching the camera and sometimes moving away from the camera.
Listing 12. Text representation of the program named Perspective01.
Project: Perspective01
Author: Dick Baldwin, 05/19/08
Scratch: 1.2.1 (6-Dec-07)
Notes:
    Click the green flag to start or restart the
program.

    This program is a non-interactive animation. The
animation tells the story of a young boy who is lost on
the moon.  He wanders around trying to find his way.
As he wanders, he gets further and further from the
camera.  Various animation tricks are used to create an
illusion of perspective.

Class variables:
    random
    stepSize

Totals:
    Sprites: 2
    Stacks: 5
    Unique costumes: 7
    Unique sounds: 0
--------

Sprite: Stage
  Costumes (1):
    moon (480x360)
  Sounds (0):
  Stacks (1):
    when green flag clicked
      switch to background "moon"
    end
--------

Sprite: BoyShrugging
  Costumes (1):
    boy4-shrugging (134x180)
  Sounds (0):
  Stacks (3):
    when I receive "move"
      go to "BoyWalking "
      show
      say I'm lost for 2 secs
      hide
    end

    when green flag clicked
      set size to 110%
      hide
    end

    when I receive "shrink"
      change size by -0.55
    end
--------

Sprite: BoyWalking
  Costumes (5):
    boy4-walking-a (110x180)
    boy4-walking-b (110x180)
    boy4-walking-c (110x180)
    boy4-walking-d (110x180)
    boy4-walking-e (110x180)
  Sounds (0):
  Stacks (1):
    when green flag clicked
      switch to costume "boy4-walking-b"
      go to x: -200 y: 0
      point in direction 90
      set size to 100%
      set stepSize to 10
      wait 0.5 secs
      show
      repeat 500
        set random to pick random 1 to 40
        if random = 1
          hide
          broadcast "move" and wait
          switch to costume "boy4-walking-d"
          turn  180 degrees
          show
        set stepSize to stepSize * 0.99
        change y by stepSize / 10
        change size by -0.5
        broadcast "shrink" and wait
        move stepSize steps
        next costume
        wait 0.2 secs
        if on edge, bounce
    end
|
Copyright 2008, Richard G. Baldwin. Reproduction in whole or in part in any form or medium without express written permission from Richard Baldwin is prohibited.
Richard has participated in numerous consulting projects and he frequently provides onsite training at the high-tech companies located in and around Austin, Texas. He is the author of Baldwin's Programming Tutorials, which have gained a worldwide following among experienced and aspiring programmers. He has also published articles in JavaPro magazine.
In addition to his programming expertise, Richard has many years of practical experience in Digital Signal Processing (DSP). His first job after he earned his Bachelor's degree was doing DSP in the Seismic Research Department of Texas Instruments. (TI is still a world leader in DSP.) In the following years, he applied his programming and DSP expertise to other interesting areas including sonar and underwater acoustics.
Richard holds an MSEE degree from Southern Methodist University and has many years of experience in the application of computer technology to real-world problems.
-end-